

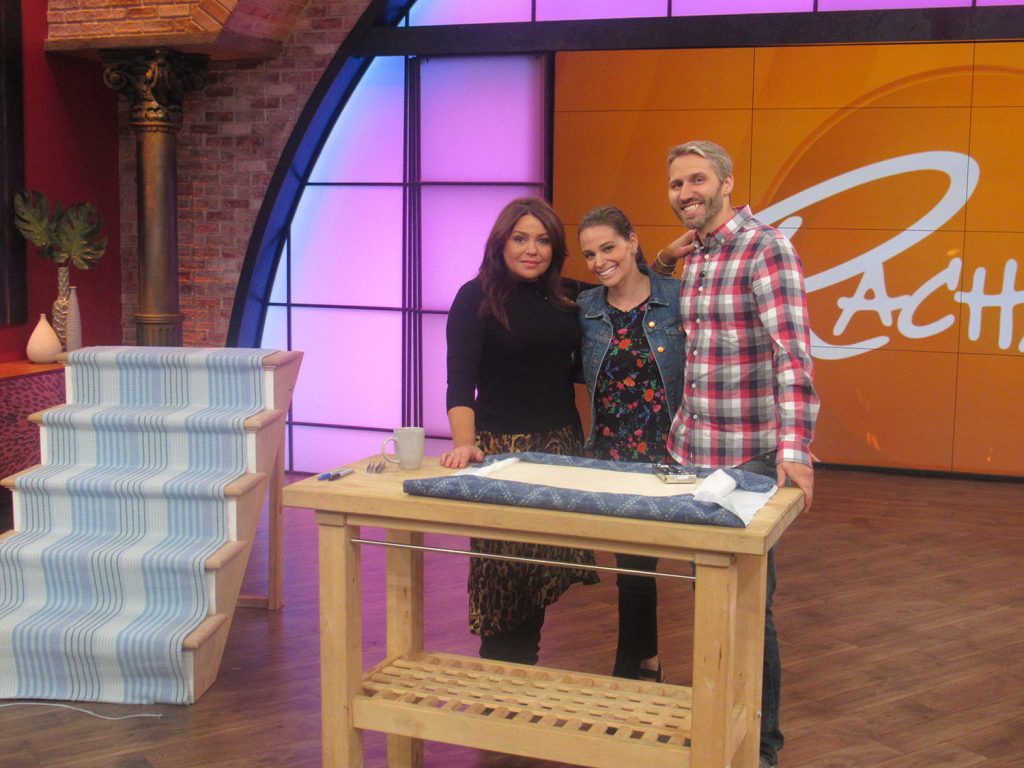
It may seem intimidating to install a stair runner yourself, but it’s so darn easy that we’ve done it twice! Thrice if you count demonstrating it on live TV (more on that later). Just follow the steps in our tutorial below, including our trick for making sure your rug is the perfect size for the project.
Adding a rug or runner to your stairs isn’t just a stylish decor choice that can add color, personality, or pattern. It’s also a safety feature! We find that adding a stair runner cuts down on slips, falls, and even makes it easier for our dog to traverse them. They also absorb sound, meaning your less likely to hear your kid clomping up and down the steps. So we highly recommend adding one if you’ve got young children, pets, or even just clumsy adults around.
DIY Stair Runner Before & Afters
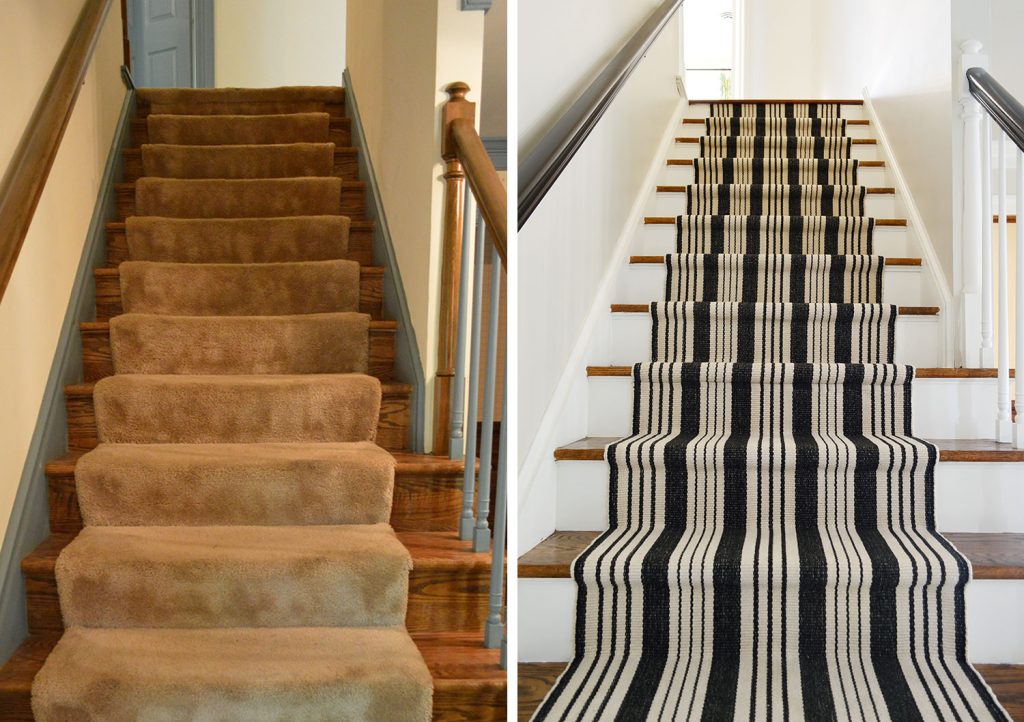
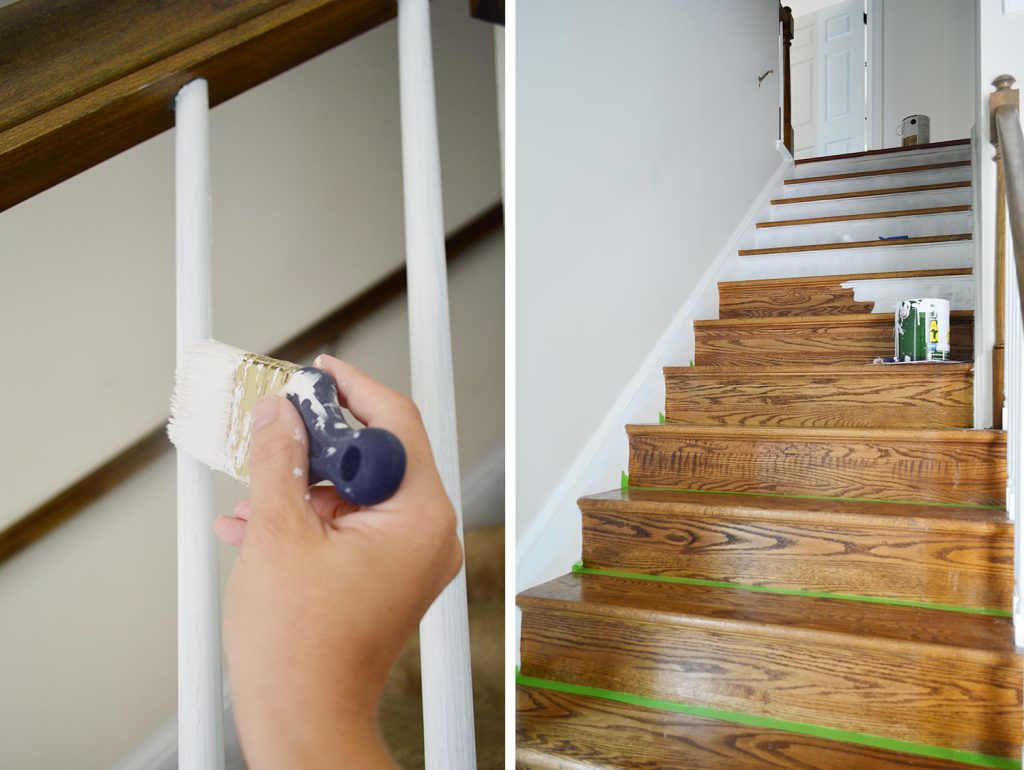
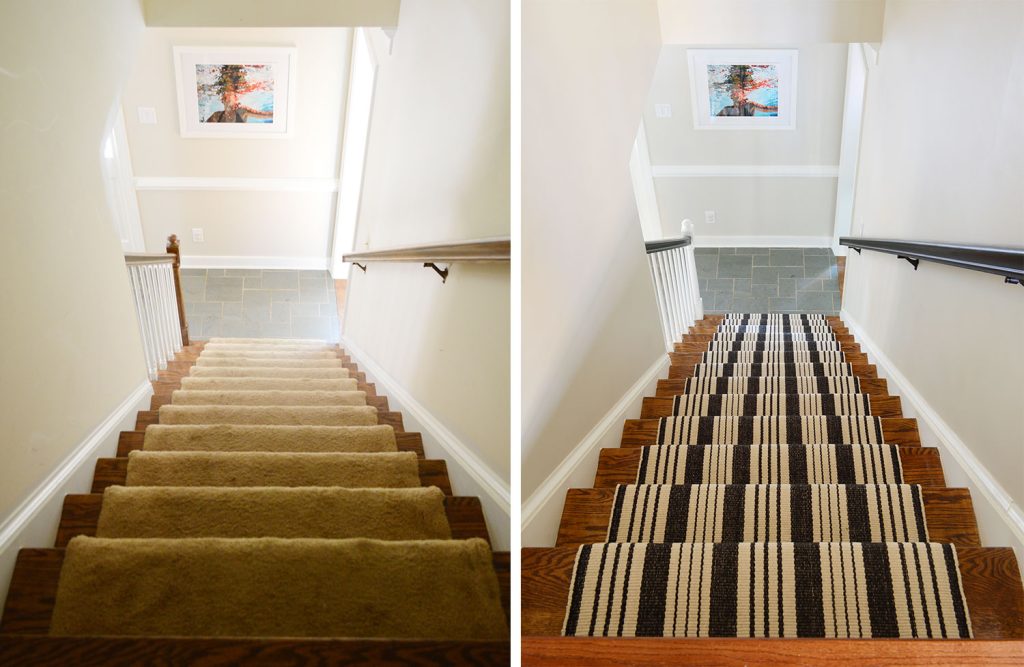
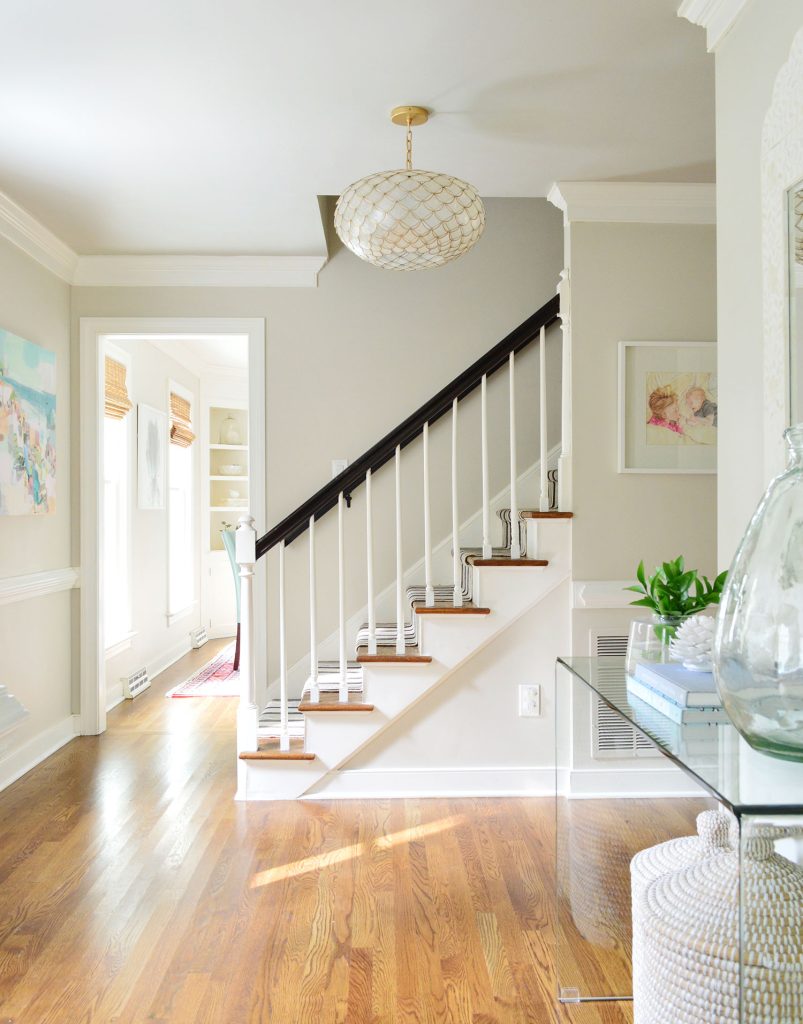
The first time we installed a stair runner, it was to replace a dingy carpet runner that came with the house. You can see in the photos below that we not only livened up the stairs with a bold striped rug, we also modernized the steps by painting the risers, trim, & balusters white and staining the wood handrails dark.
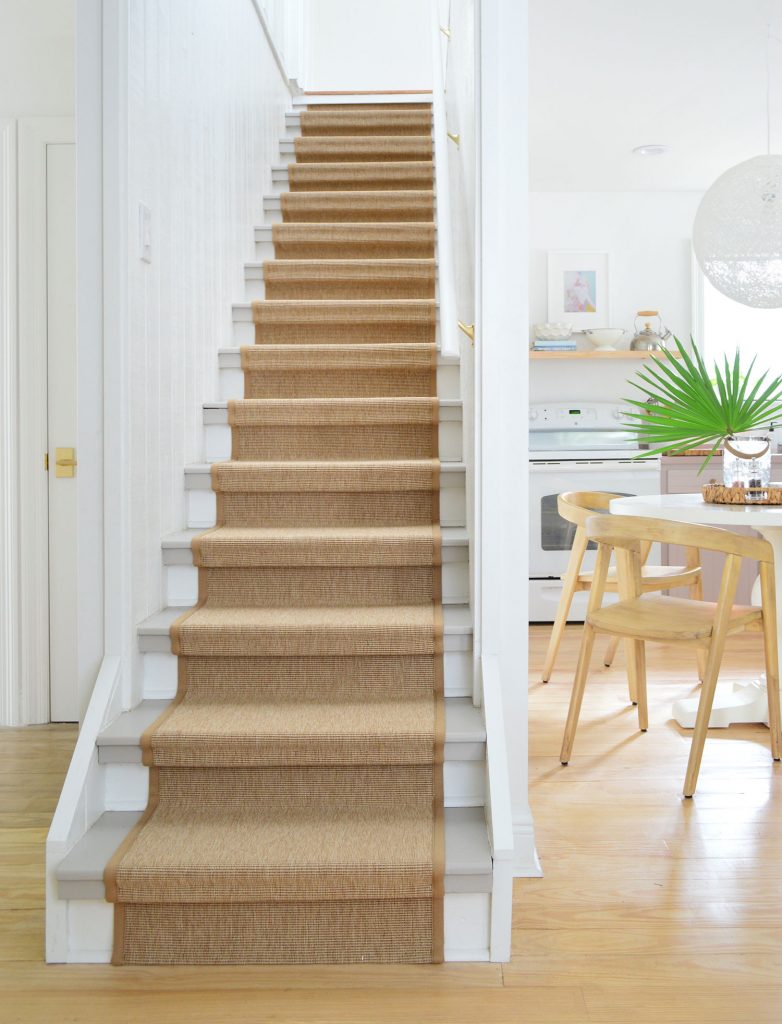
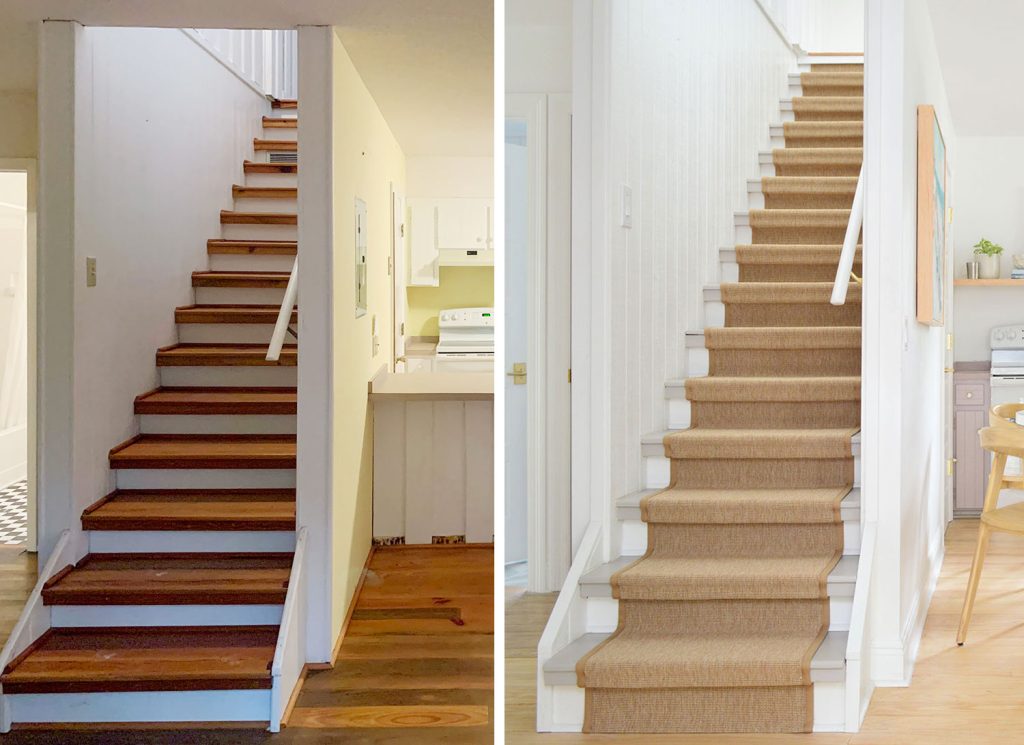
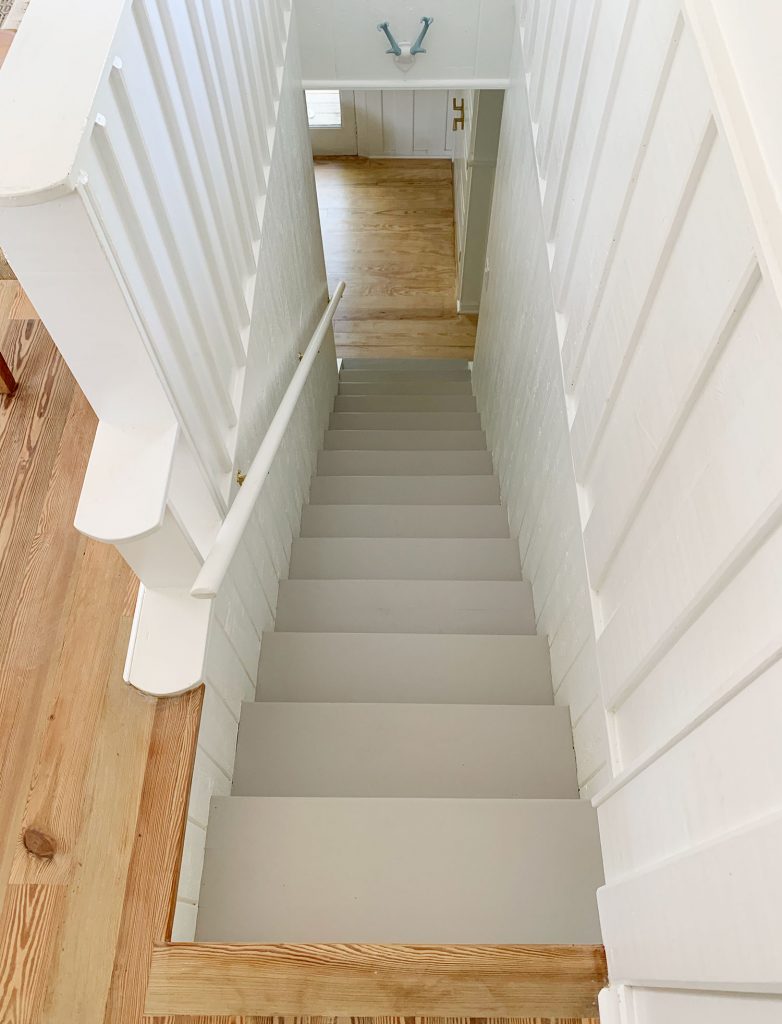
For our second install, here in our current home, we used a beachy sisal runner instead. We also painted the treads a wary gray to brighten them up.
The “third” stair runner we added was for a DIY segment we taped for The Rachael Ray Show. We only shot about 3 staples on camera, but we prepped the small fake staircase backstage. It’s too bad we didn’t get to do a whole staircase. That runner is cute!
Overall, you have lots of ways you can customize this project to suit your style and your stairs. So let’s dive into the tutorial!
Tools, Materials, & Cost
Here are the supplies and tools you should have handy to install your own stair runner:
This doesn’t have to be an expensive project either. Our first runner installation cost less than $300! It mostly depends on the runner you choose and how much you need.
Steps To Install A Stair Runner
Our project in total took us about 20 hours, but that also included removing the old runner and painting the risers and railings. The actual stair runner install only took about 4 hours, although may depend on the length of your stairs. We’ll go into each step in more detail, but here’s an overview of the process:
- Remove your old runner (if needed)
- Measure
- Select a runner
- Paint or stain your stairs (optional)
- Mark your placement
- Cut the rug pad
- Prepare your staples
- Start at the top
- Connect two runners (if needed)
- Finish the bottom edge
Step 1: Remove your old runner
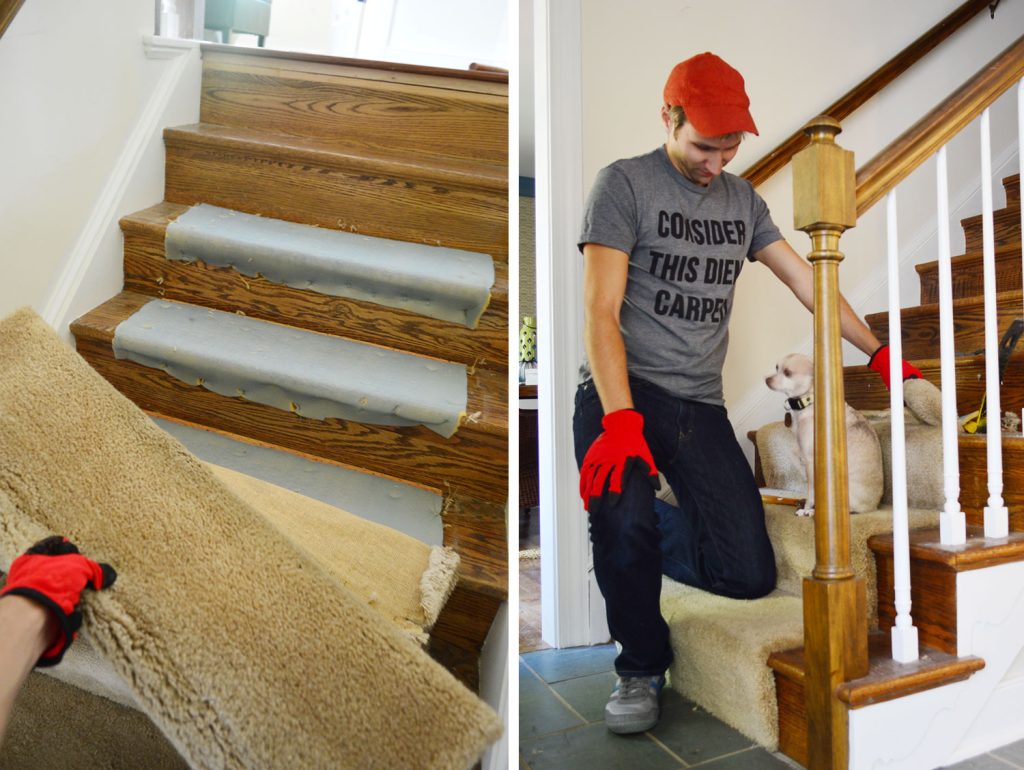
This step only applies if you have an existing rug, runner, or carpet on your stairs that needs to go. This process may take time – especially getting all of the old stapes up! We counted nearly 600 staples in our old carpet. We have a separate stair runner removal tutorial for this, including what tools you’ll want to help get that old carpeting off.
Step 2: Measure
Before buying your runner, you’ll need to measure how much you’ll need. As with any rug, the important measurements are length and width. Knowing this will also help you determine if you can purchase a stock size or need to order something custom.
Measuring runner length
We suggest using a string or flexible measuring tape to determine the length of one step. This means riser + tread, including around the front bullnose edge. Multiply this measurement by the number of steps you have, and then add 10-15% extra. Having too much material is easier to deal with than not having enough!
Measuring runner width
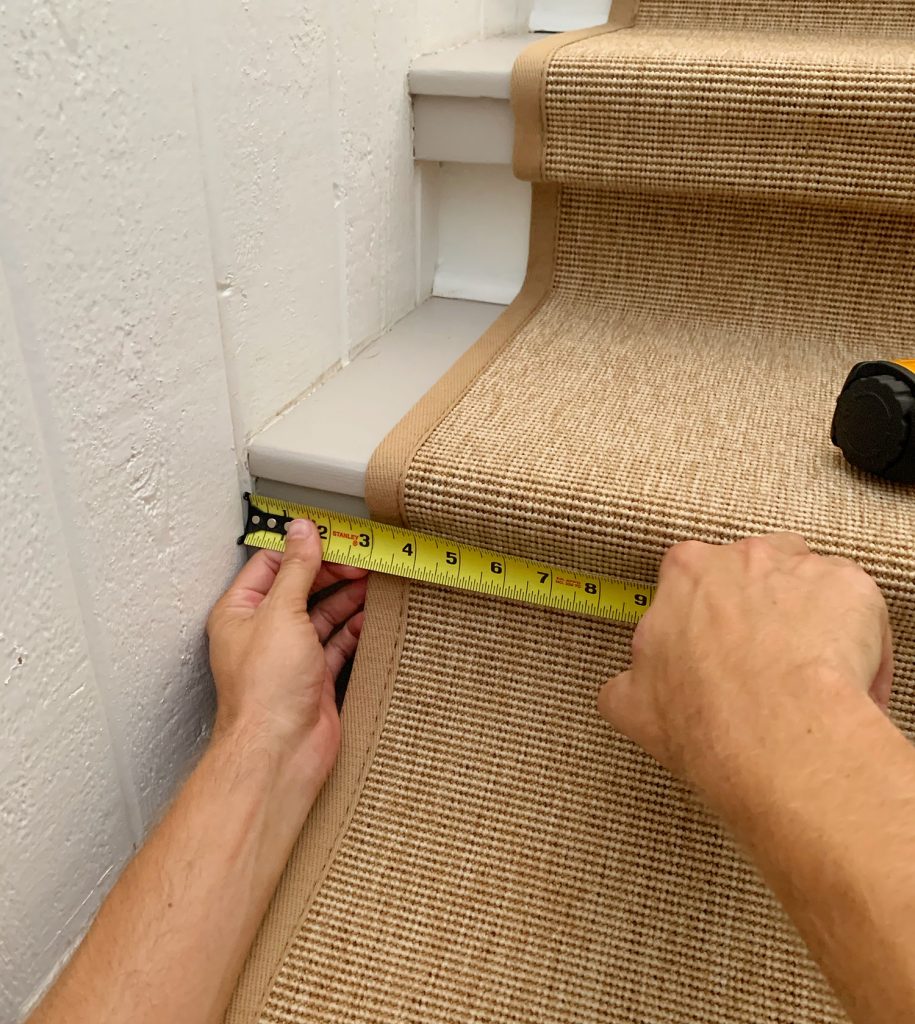
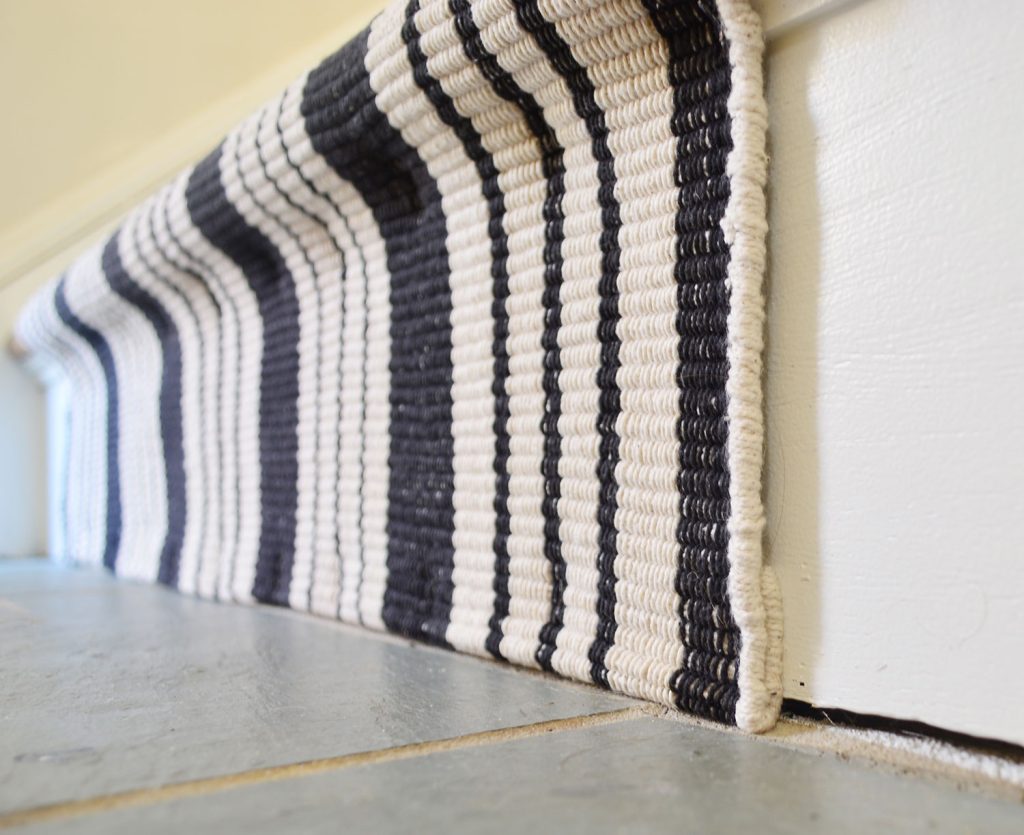
Most stair runners don’t go wall-to-wall. Instead, they leave about 2-3″ exposed on either side (see above). This number is personal preference, and it may be dictated by stock sizes. Measure the width of your narrowest stair, and subtract 4-6″ to get your runner width. Just be mindful that many staircases “flare” at the bottom, so make sure whatever width you choose will fit and look good from top to bottom.
Step 3: Select a runner
Virtually any carpet or rug can be turned into DIY stair runner. However, we suggest choosing something that will be durable and easy to clean, especially if your stairway gets lots of foot traffic. Indoor/outdoor rugs and natural fiber rugs like wool or cotton are great for these reasons. We also suggest something low pile, since they are easier to keep clean. We have used both stock and custom runners for our stairs.
Using a stock runner
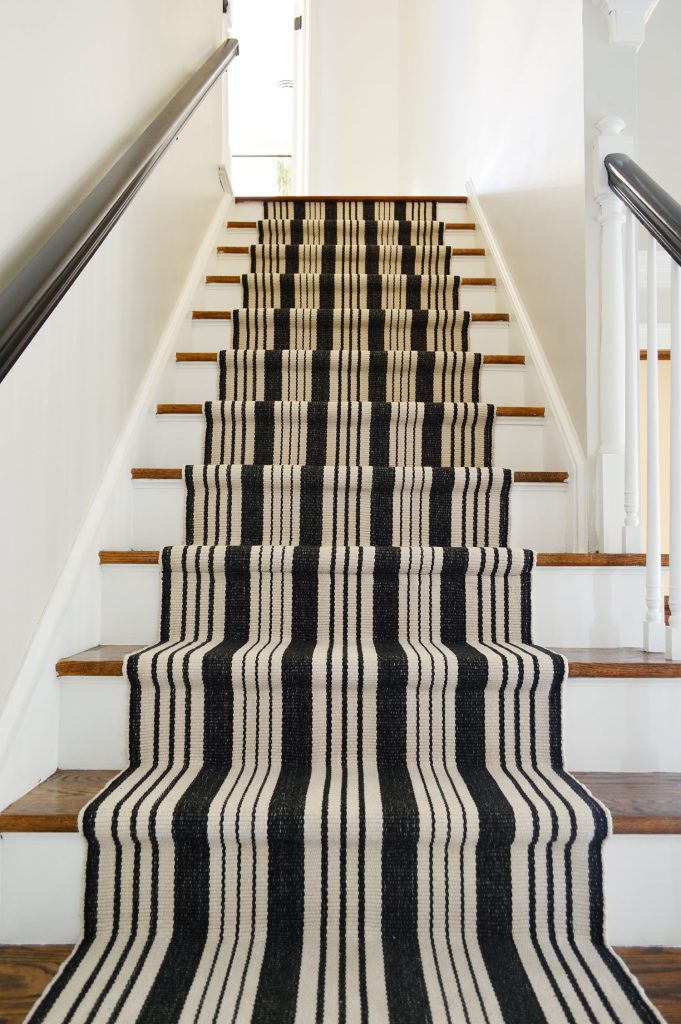
For our striped runner, we used a rug from Annie Selke (formerly Dash & Albert) because they are known for their durability. They also have tons of patterns and colors, and most styles come in a variety of sizes. We used two 2.5′ x 8′ Birmingham runners, but they now also sell a 20-foot version and as a customizable size. After 7 years of use, we can vouch that it held up great (apart from some fading from sun) and felt quite soft underfoot!
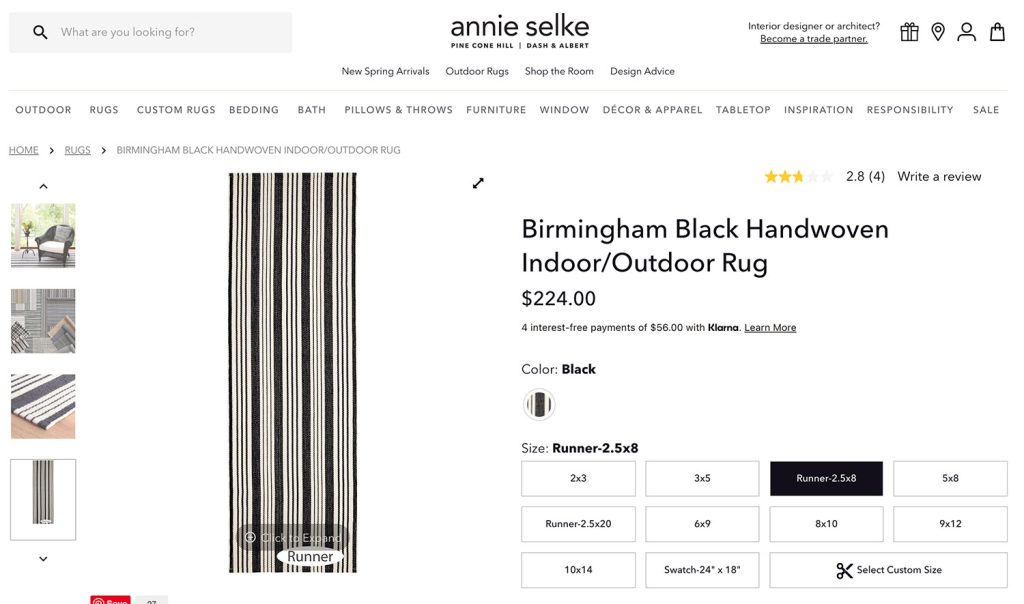
Stock runners are typically cheaper, but they may require more ingenuity to fit precisely to your space. Don’t worry – we’ll show you how!
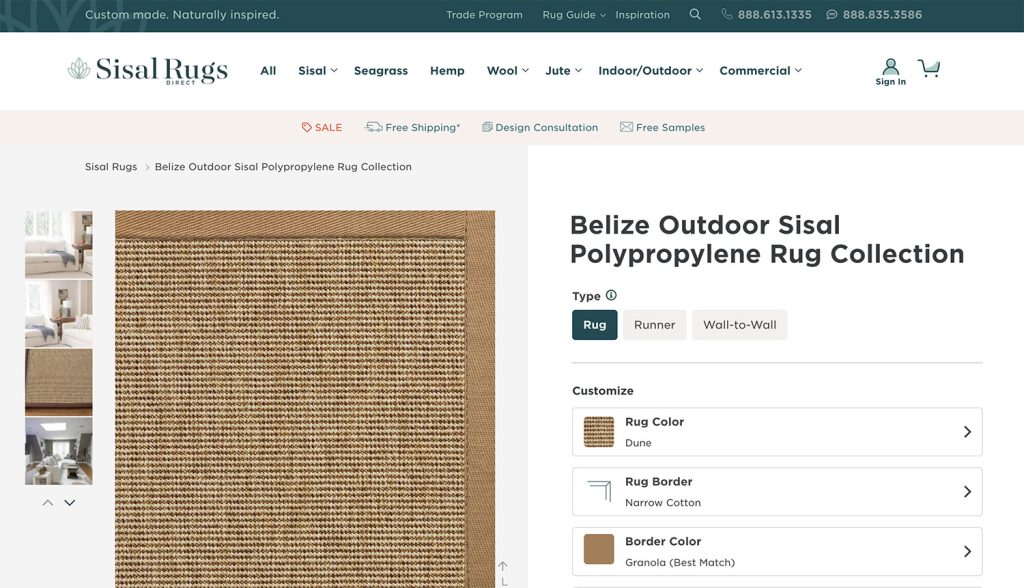
Using a custom runner
For our sisal runner, we ordered a custom outdoor rug from Sisal Rugs. This gave us great control over the exact look – we picked the color, border material, border color, size, etc – and only cost us slightly about $100 more than 2 Annie Selke rugs would’ve at the time.
We have been equally happy with both types of rugs we’ve used – stock vs custom, cotton vs sisal, bold vs neutral – so you should feel good about choosing whatever is best for you.
Step 4: Paint or Stain Your Stairs
If your stair makeover plans include any painting, staining, or other potentially messy updates: do them now! You don’t want to have to worry about dripping a new rug later!
Before we added our striped runner, we stained the handrail a darker color and painted the balusters, trim, and risers white. These were somewhat time-consuming tasks, so they are great to tackle while you’re waiting for your rug order to arrive.
Before adding our sisal runner, we decided to paint the stair treads a warm gray to cover up some discoloration in the stain. We used this Porch & Floor Enamel in Requisite Gray by Sherwin-Williams. It didn’t require a primer and has held up great!
This also is a great time to do any other repairs to the stairs – like if you have a loose or squeaky tread, or need to fix any nearby molding.
Step 5: Mark Your Placement
Once you’re ready to install your runner, start by marking its placement on every step. This will help make sure it stays straight and doesn’t drift to the side as you install it. We used a measuring tape and painter’s tape to mark the edges along each tread, which you can see below.
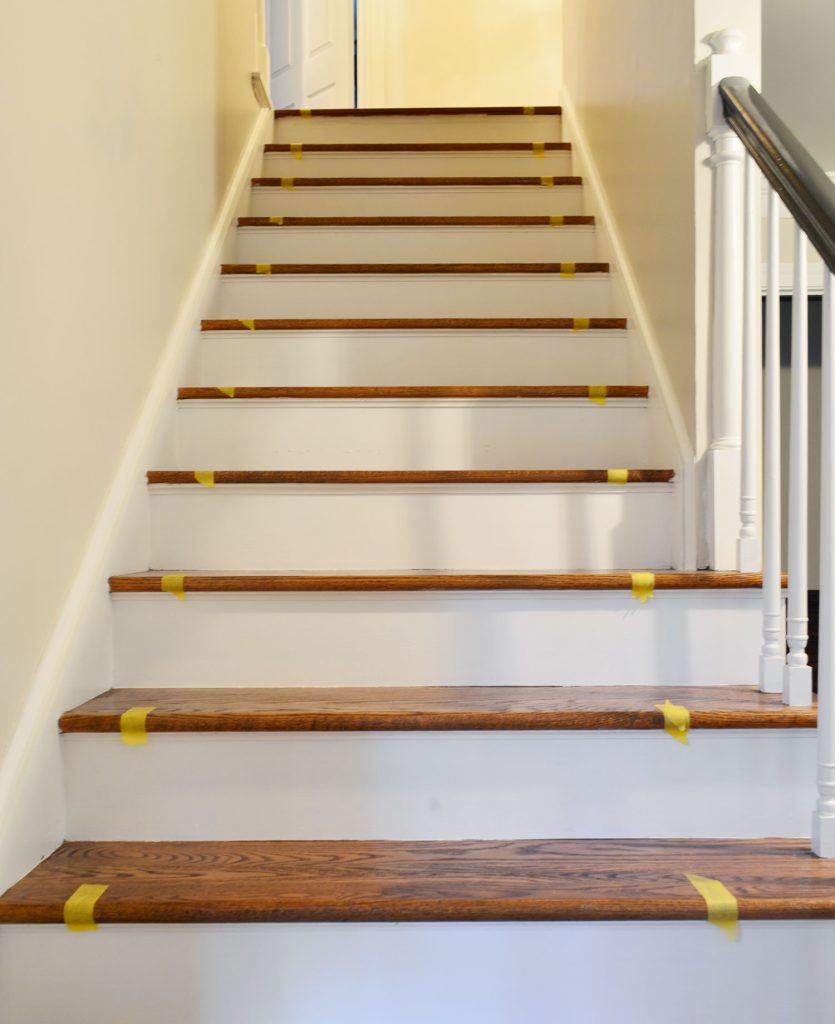
Alternatively, you can check your placement with a ruler or measuring tape as you go. We just found it faster to tape down guides at the start of the project.
Step 6: Cut The Rug Pad
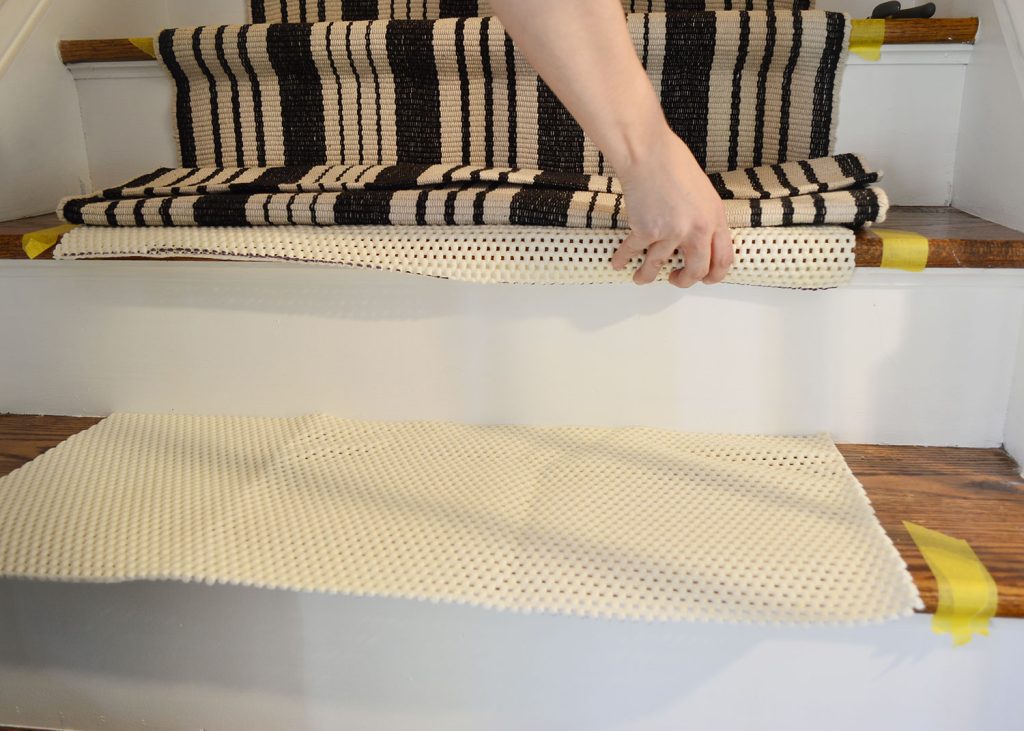
You’ll want a rug pad under your runner to (1) provide more cushion and (2) keep the runner in place. If you don’t want extra cushion, you can use carpet tape instead. We have used both a felt rug pad and a rubber rug pad with equal success. Just make sure whichever you choose has a non-slip design. Both are sold in multiple sizes, including runner lengths, and don’t need to be very thick (we use 1/8″ depth).

We prefer to use the rug pad ONLY on the tread surface (not the vertical riser). This saves money and also prevents unnecessary bulk against the riser. But it does require some time upfront to cut the rug pad into strips. Luckily they usually cut easily with household scissors. We leave it long enough to wrap around the front nose of the stair.
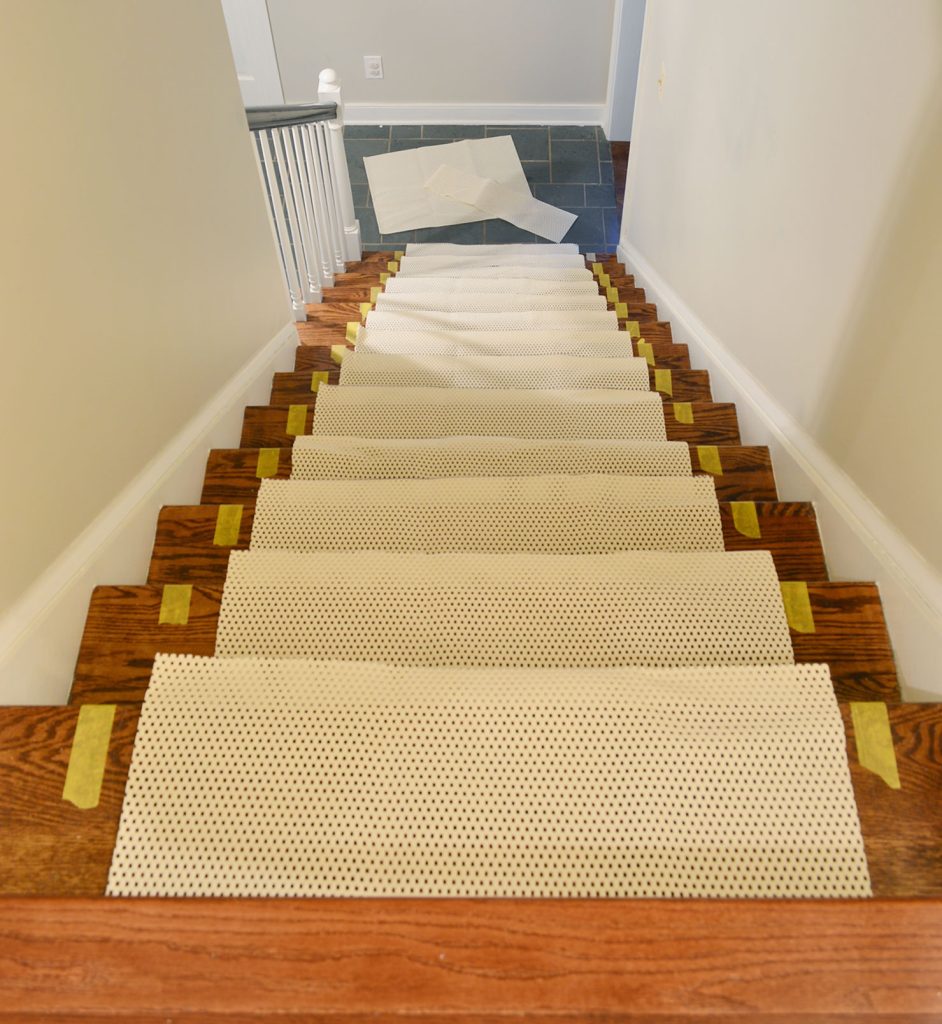
We leave enough overhang so the rug pad can wrap around the bullnose of each step, as you can tell above.
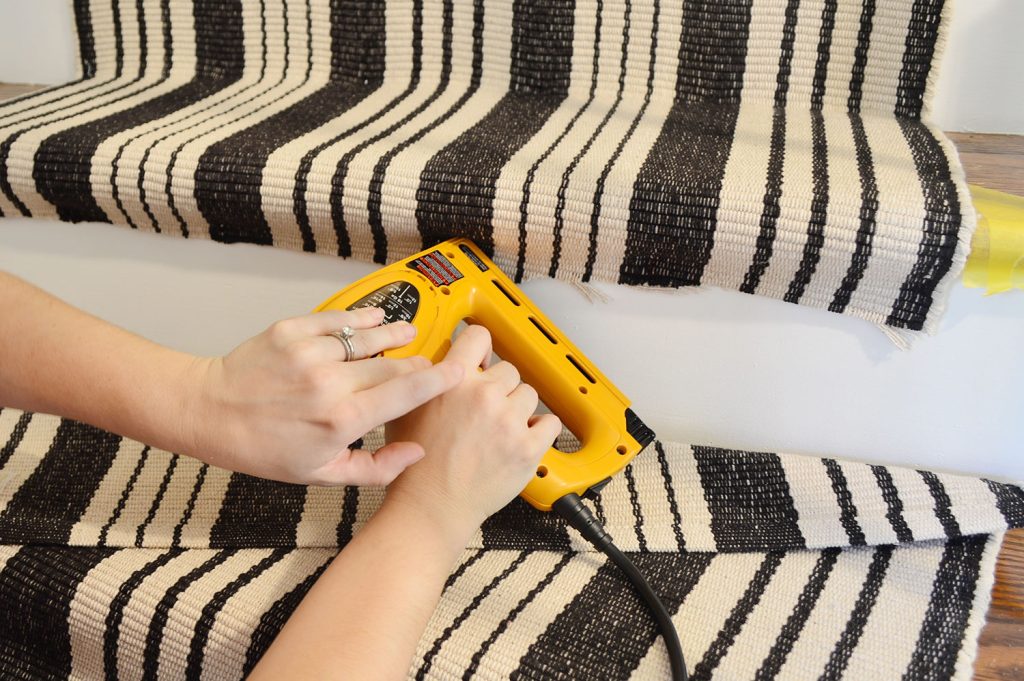
Step 7: Prepare Your Staples
Here comes the weird step, but we promise it’s worth it! After some trial and error, we found an electric staple gun designed for upholstery projects to be the most effective way to secure a stair runner. A hand-powered staple gun was too light-duty. We needed something with more oomph!
The drawback to this approach is that your staples may be visible UNLESS you take the time to color them first. I know it sounds weird, but trust us. It works!
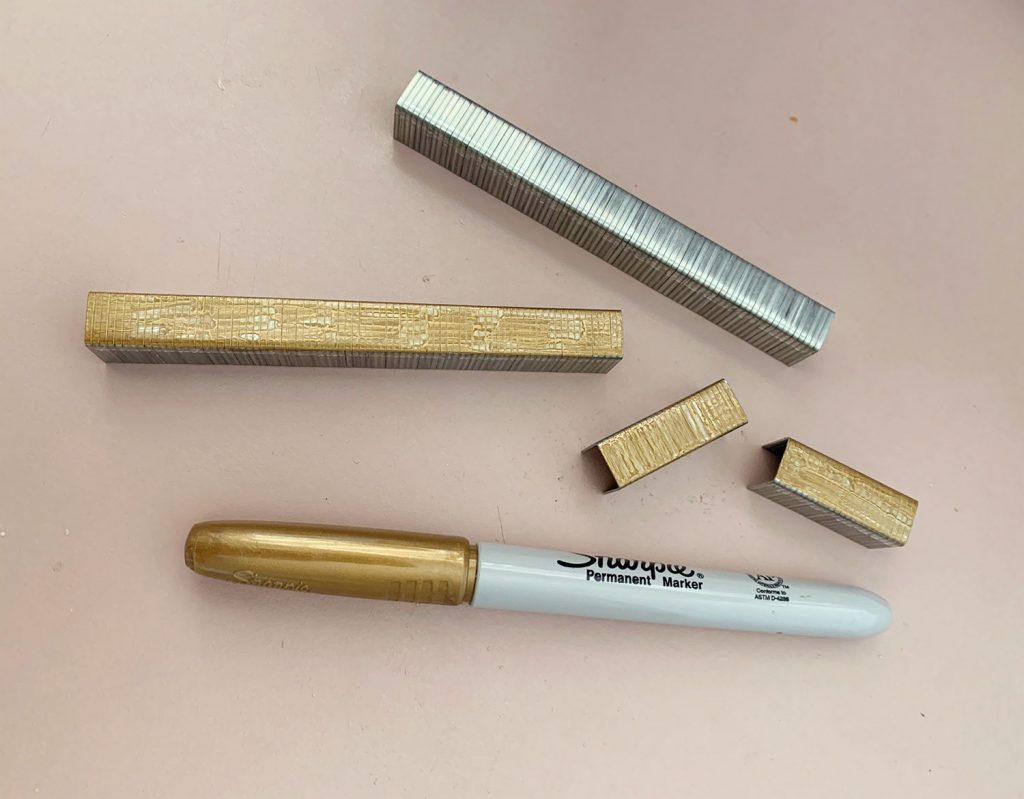
For our sisal runner, we used a gold Sharpie to roughly color a strip of staples before loading them into the stapler. For our black and white runner, we did the same thing with a black Sharpie.

Matching the exact color of your rug is not important because the main benefit of this approach is that it removes the SHINE of the staples. The staples were mostly visible when they catch the light, so the Sharpie ink dulls them enough that they camouflage into the pattern of the rug.
Coloring one big strip of staples before you put them in the stapler is much faster than doing it individually after they’re stuck into your rug. But you can test it on a few stapled staples first if you want to determine what color offers the best disguise.
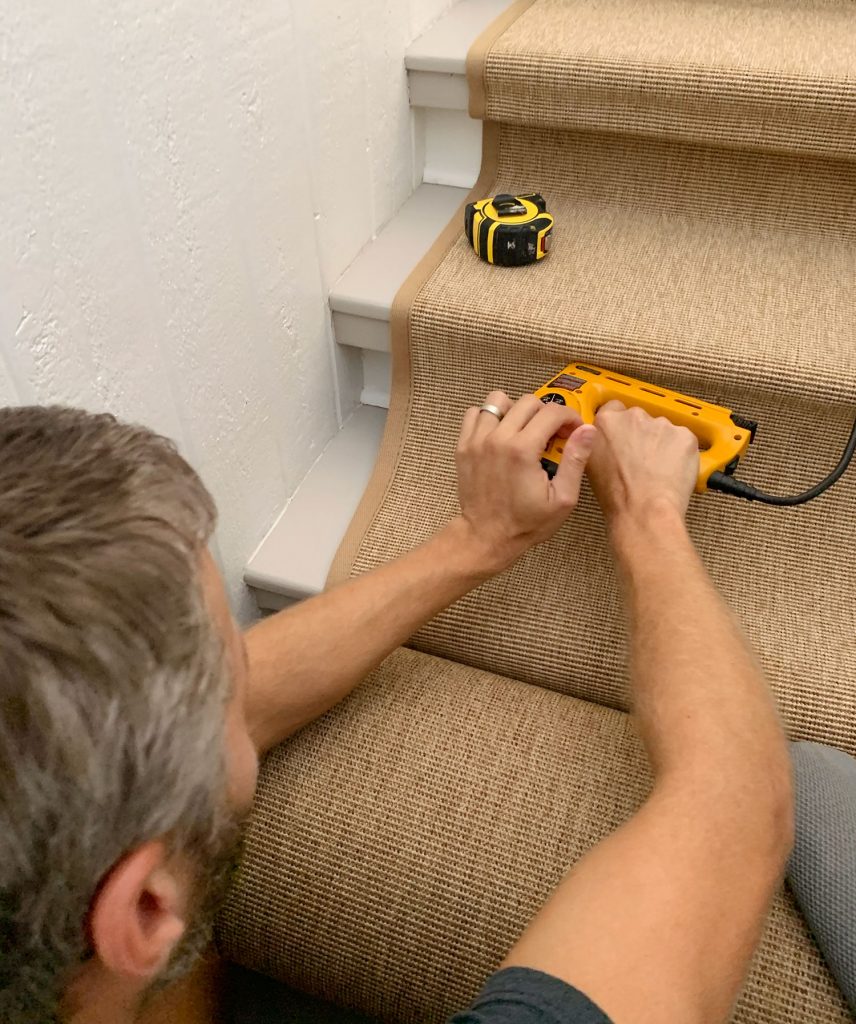
Step 8: Start At The Top
Begin stapling your runner under the lip at the top of your staircase. Take your time to position your runner precisely – keeping the top edge flush, and your edges aligned with your tape markings. Use the electric staple gun to secure it at each edge and about 4-5 places in the middle. Your rug’s pattern may determine where best to place your staples so they are as hidden as possible. You can also go back and add more staples later if it is sagging anywhere. The important part now is to just get it attached.
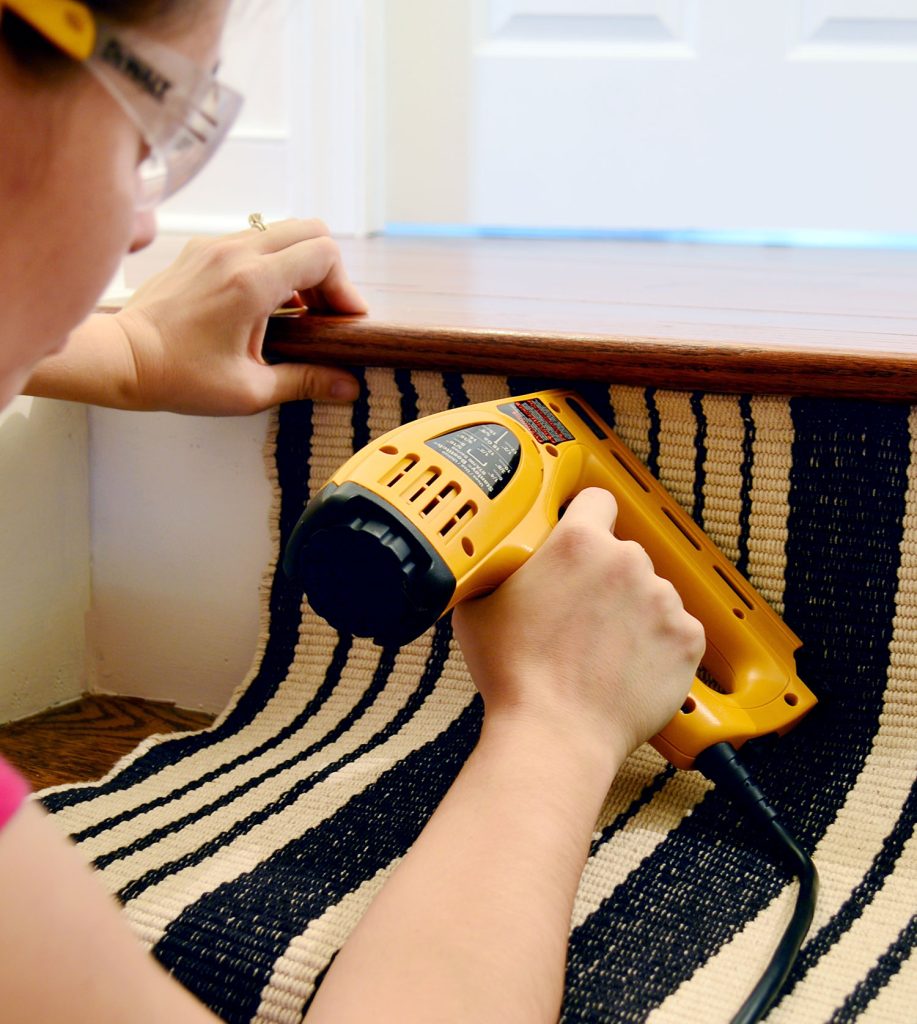
With the runner stapled along the top, pull it tight against the riser and staple along the bottom into the RISER, not the TREAD. At no point during this process will you need to nail into the treads. This way you don’t have to worry about bare feet ever feeling cold metal.

Next, pull the runner tight along the tread and repeat this process, starting with another row of staples under the lip of the next tread.
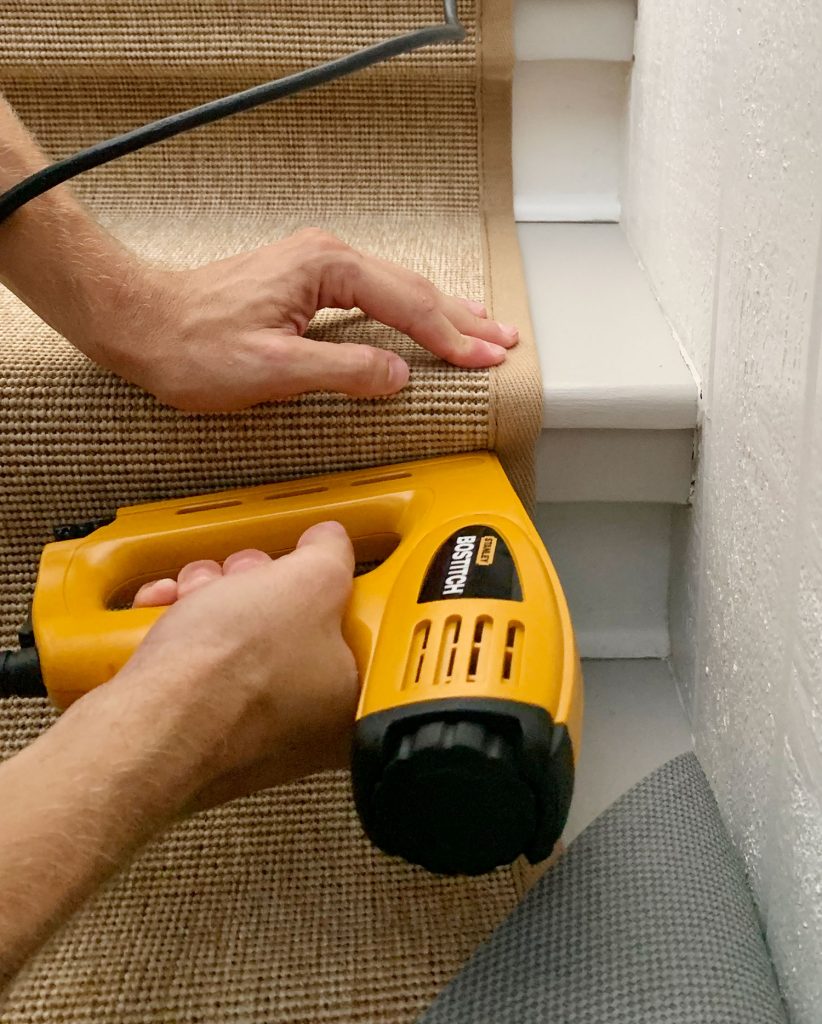
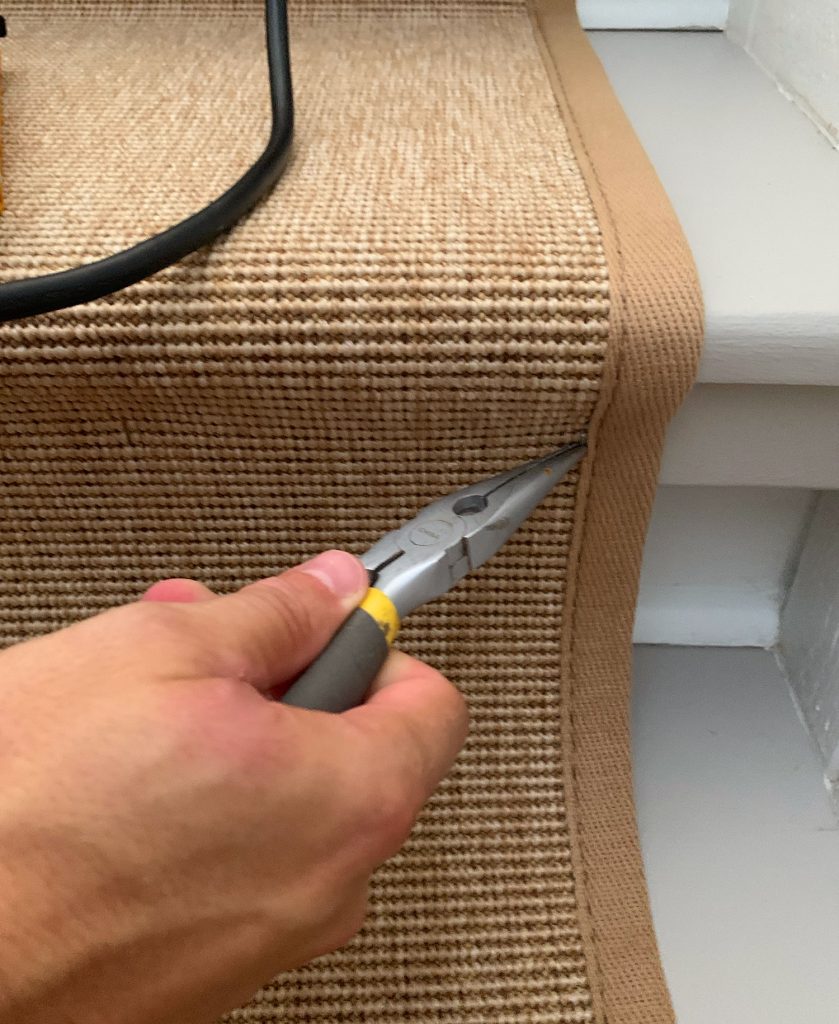
Use your judgment as to where & how many staples are needed to hold your runner tight to the stairs. With our sisal runner (above) we had two “lips” under each tread, so we had to do two rows of staples along the top of each step. Also, don’t fret if you need to remove a misfired staple now and again. Just keep some needlenose pliers handy.
Continue this process, working down your stairs towards the bottom. Just remember to keep pulling your runner tight and make sure it’s not drifting to one side as you go. Oh, and don’t forget to put down your rug pad strips as you go.
Also, we find the electric staple gun works best when you apply pressure to the back of it as you fire. This helps the staples sink deeper into the swood.
Step 9: Connect Two Runners
If one runner won’t reach the bottom of your stairs, it’s easy to seamlessly connect two separate runners. The best way to do this is to hide the transition under the lip of a tread. Use scissors to cut off any extra material from your first runner so that it terminates under the lip.
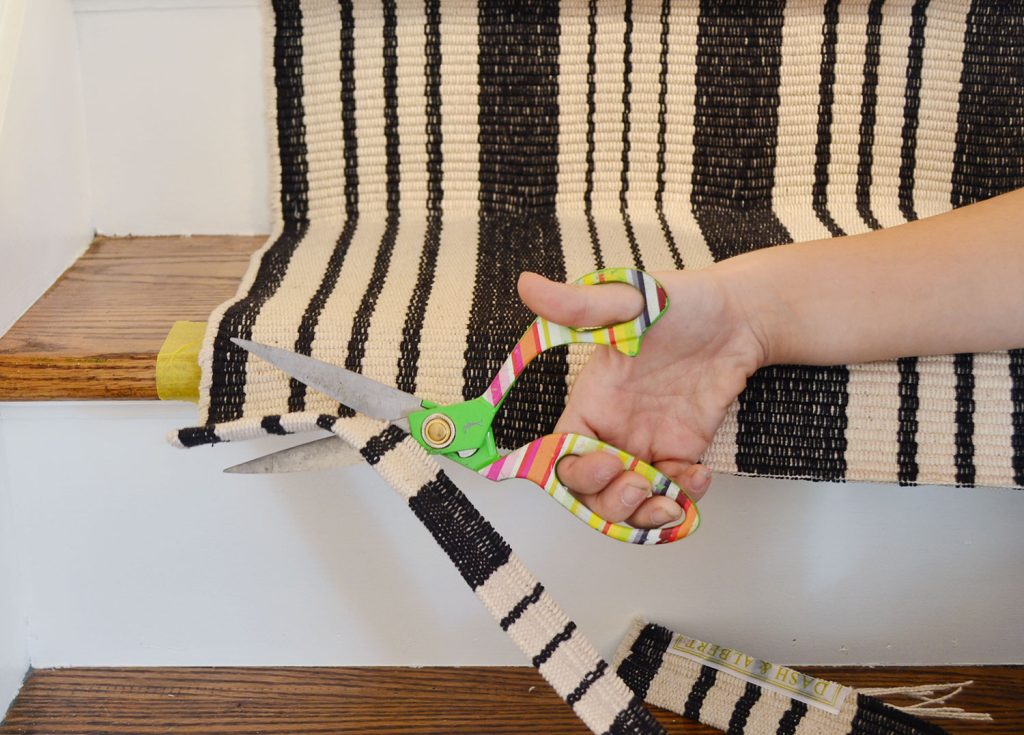
Staple that cut end right under the bullnose edge of the tread, just as you have been doing.
Then attach the second runner under the lip, just like you did with the first runner at the top of your stairs. From there, you can continue down your stairs with the second runner. Here is a finished picture of our stairs. Can you find the spot where one runner ends and the other begins?
You can kinda see it there about 3 steps up. The transition is not 100% undetectable, but it’s so subtle you only really notice it if you’re looking for it.
Step 9: Finish The Bottom Edge
Once you get to the bottom, use scissors to cut off any excess material – leaving about an extra inch of material. Fold this extra bit back under the runner and staple it into the bottom of the rise. This fold gives a cleaner, even edge on the bottom (since some runners will fray slightly when cut).
And just like that, you’ve finished your stair runner installation!
You can read more specifics about installing our sisal stair runner, and see more before & after pictures of that space.
Stair Runner FAQs
Here are answers to other questions we frequently get about installing a stair runner.
How well do stair runners hold up?
Our stair runners have held up very well, even with busy kids & pets in the house. Like any rug or carpet, they require regular vacuuming and the occasional stain removal. But as long as you choose a durable material like an indoor/outdoor polypropylene rug or a natural fiber rug, you should have little trouble. We lived with our striper runner for over 7 years before moving, and we only experienced light fading at the bottom (where it got lots of sunlight) and some small, but barely noticeable, fraying on the nose of a step or two.
Do stair runners damage the stairs?
When you install a stair runner, you will put small staple holes in your stair risers. A stair runner also may cause your paint or stain finish to fade unevenly, due to the steps being partially covered. However, both of these can be remedied with wood putty and a fresh coat of paint or stain.
What are the advantages of a stair runner?
In addition to improving the look of your stairs, you’re also making your steps safer and quieter when you install a stair runner. Rugs absorb sound and cut down on the noise of loud footsteps. They also are less slick than wood steps, which makes slips and falls less common.
How do stair runners stay in place?
Stair runners stay in place thanks to a combination of staples and rug pads. The staples hold the rug tight to each riser, helping it form to the shape of the staircase. Rug pads under the tread keep it from moving underfoot. Alternatively, you can use stair carpet rods to hold the rug tight to the riser.
What are alternatives to a stair runner?
In our historic beach home, we didn’t want to install a permanent stair runner. We used two alternate solutions to help our dog not slip on the stairs. On our front steps, we used non-slip sisal treads held in place with carpet tape. On our back stairs, we used clear non-slip treads for a nearly invisible look.
*This post contains affiliate links, so we may earn a small commission when you make a purchase through links on our site at no additional cost to you.


