

Behold: our DIY wire trellis! I’ve wanted to try this project for over a decade and I’m over the moon with how it’s turned out. All it took was some basic tools, wire & hooks, plus a climbing vine to bring it to life. Oh, and planning. It does a bit of planning. So let’s show you how to make your own!
My urge to make a vine trellis intensified after we painted our house white last fall. The back of our garage practically screamed “ADD A DIAMOND TRELLIS ON ME!” It feels like such a chic garden accent, that our white house finally felt fancy enough for one.
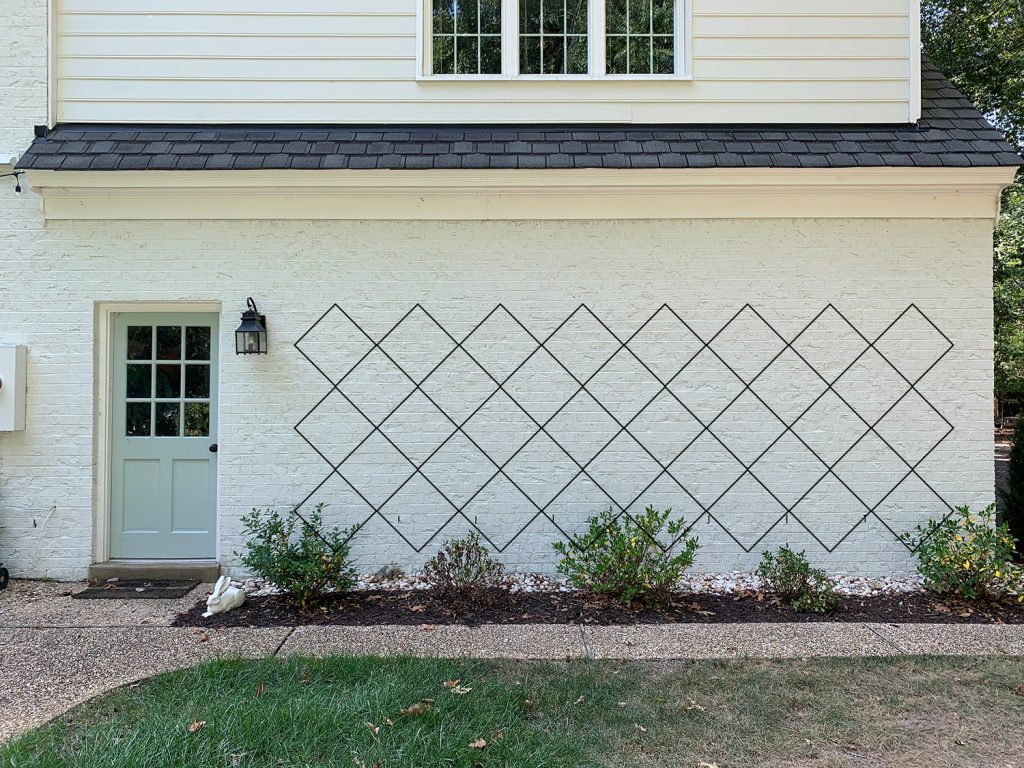
Wire Trellis Before & After
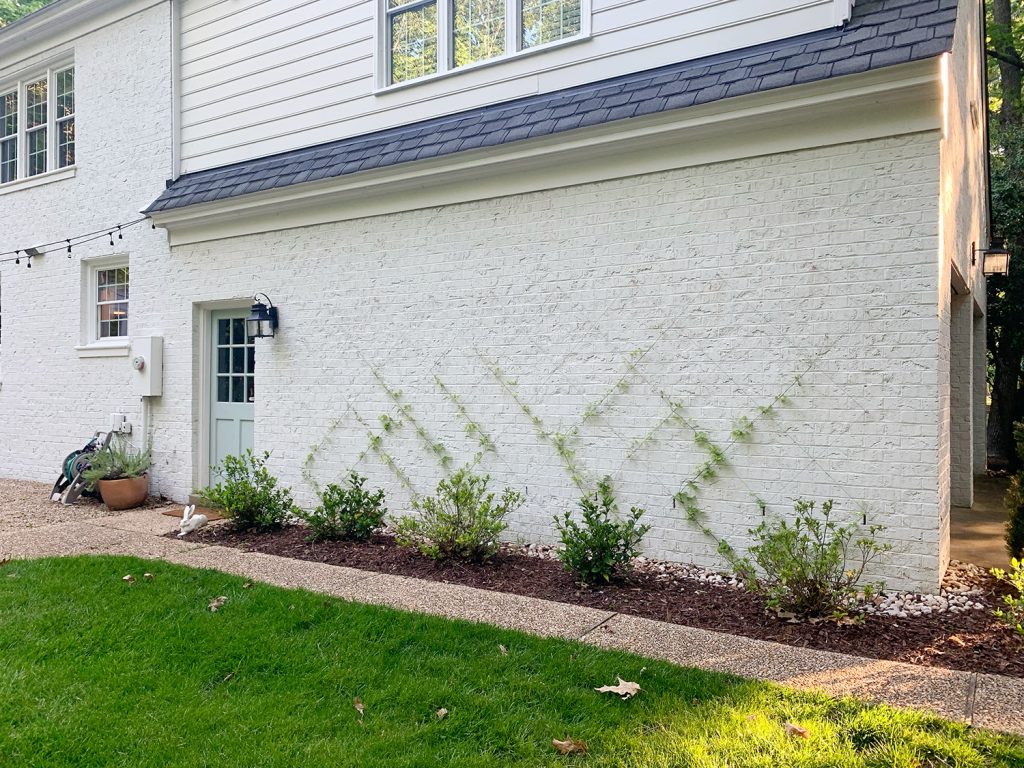
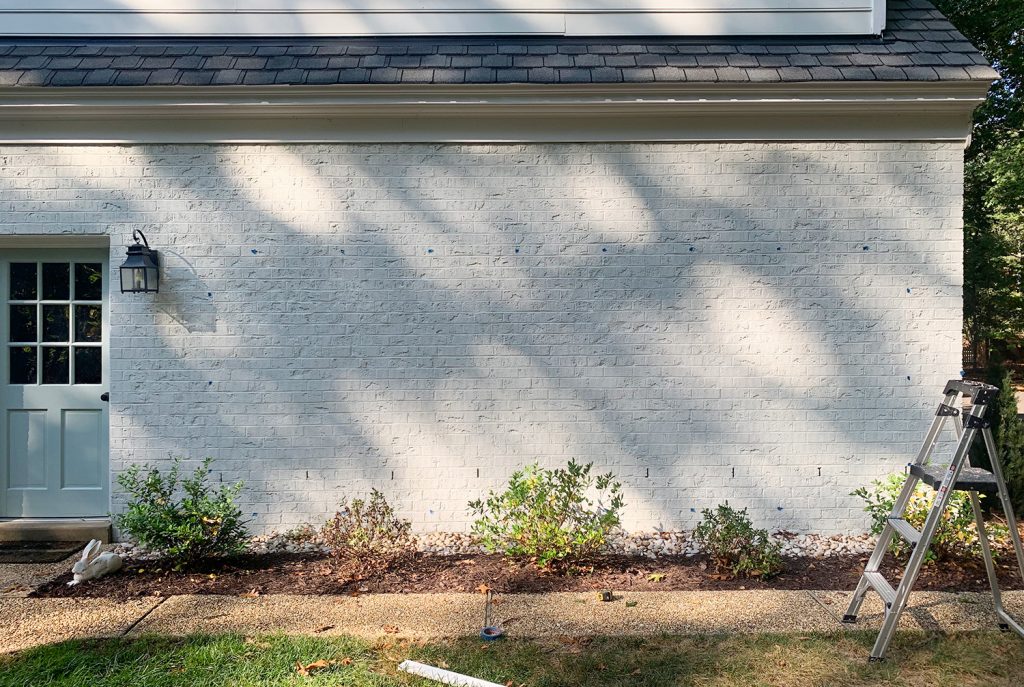
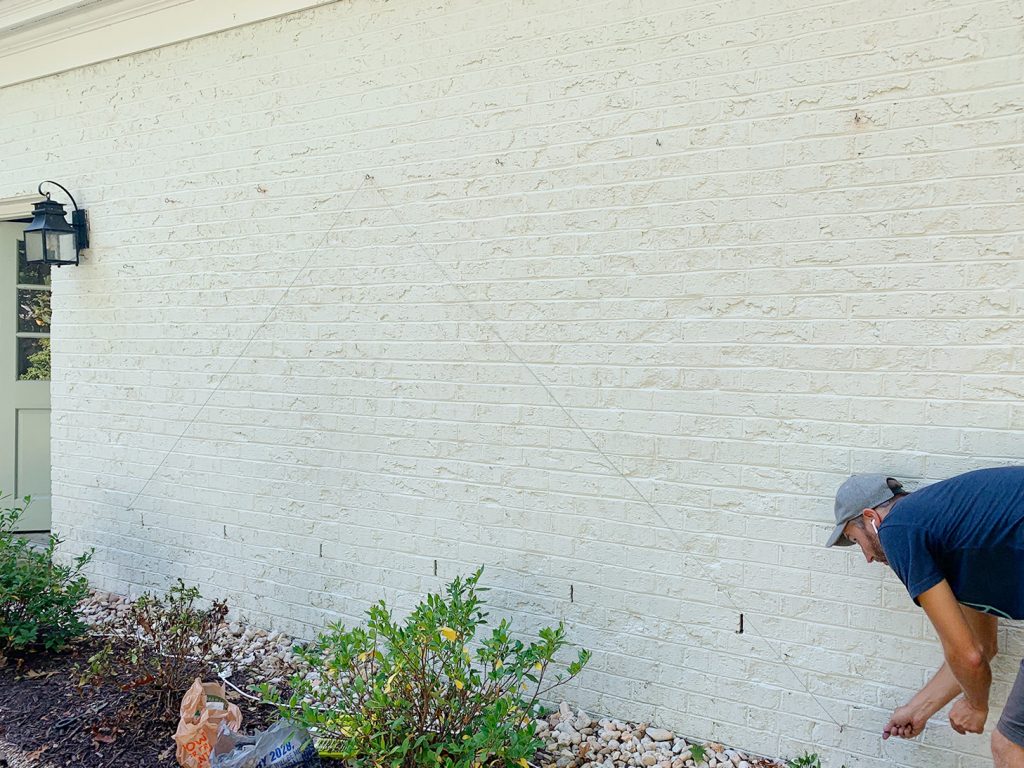
Before we jump into the tutorial, let’s show you the progress our little clematis vines have made so far. Here is how the area looked before we installed the wires.

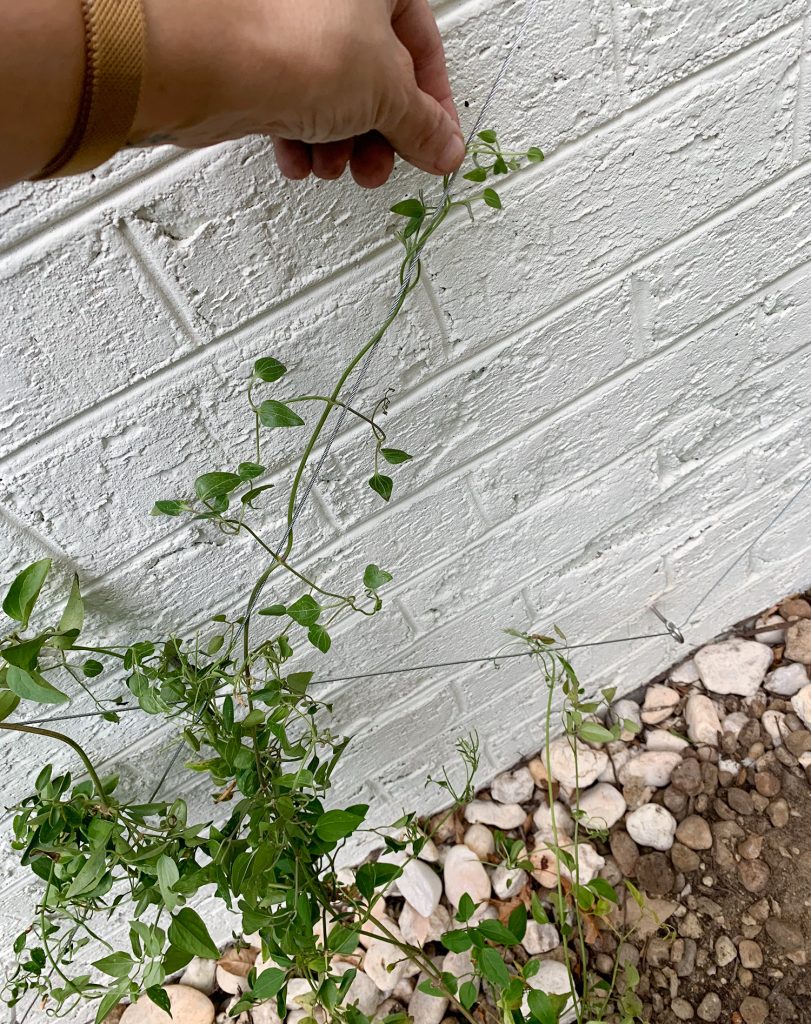
Here’s a close-up of the project after we finished. You can see the diamond-shape of the wire trellis, but the vines we planted (clematis) were barely visible behind the row of plants in front.

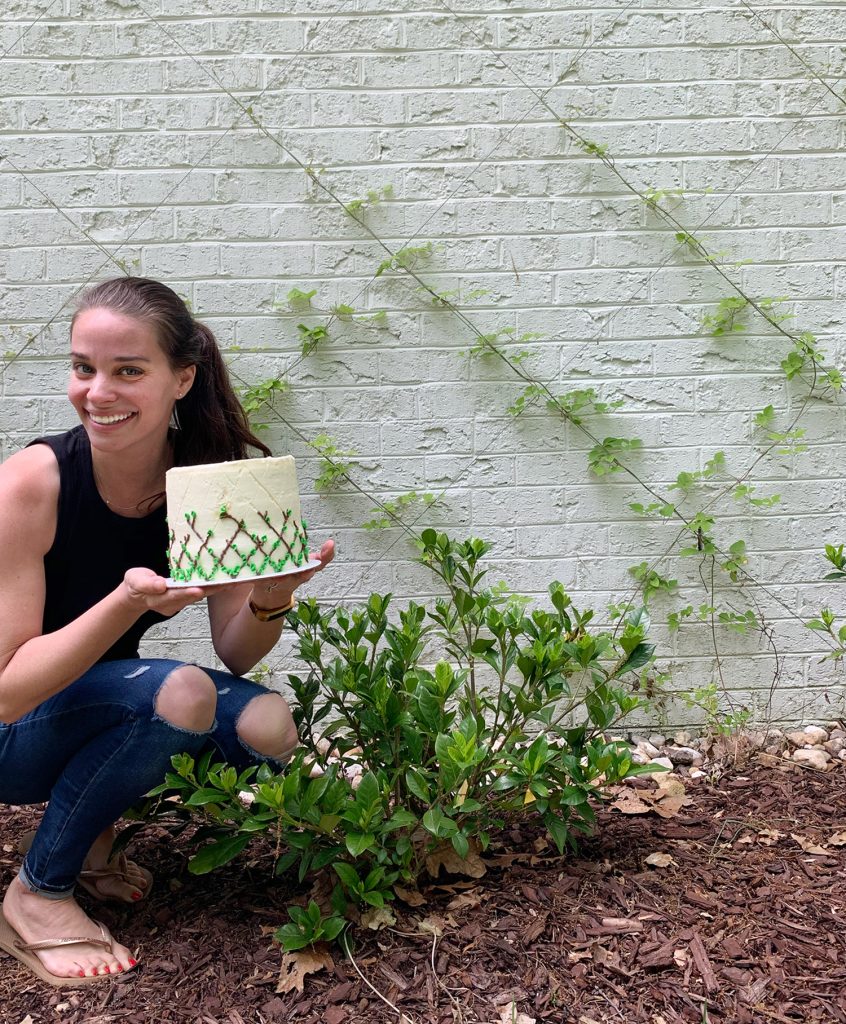
But just a couple of months later, they’d made impressive progress! This photo was taken right before we moved to our current house in Florida. I wish we could’ve seen it grow more, but this is impressive for just one season!

My friend knew how proud I was of the progress, that she even baked me a cake to celebrate. #friendgoals #cakegoals #plantgoals
So now that you’ve seen what’s possible. Let’s show you how to make a DIY vine trellis for yourself.
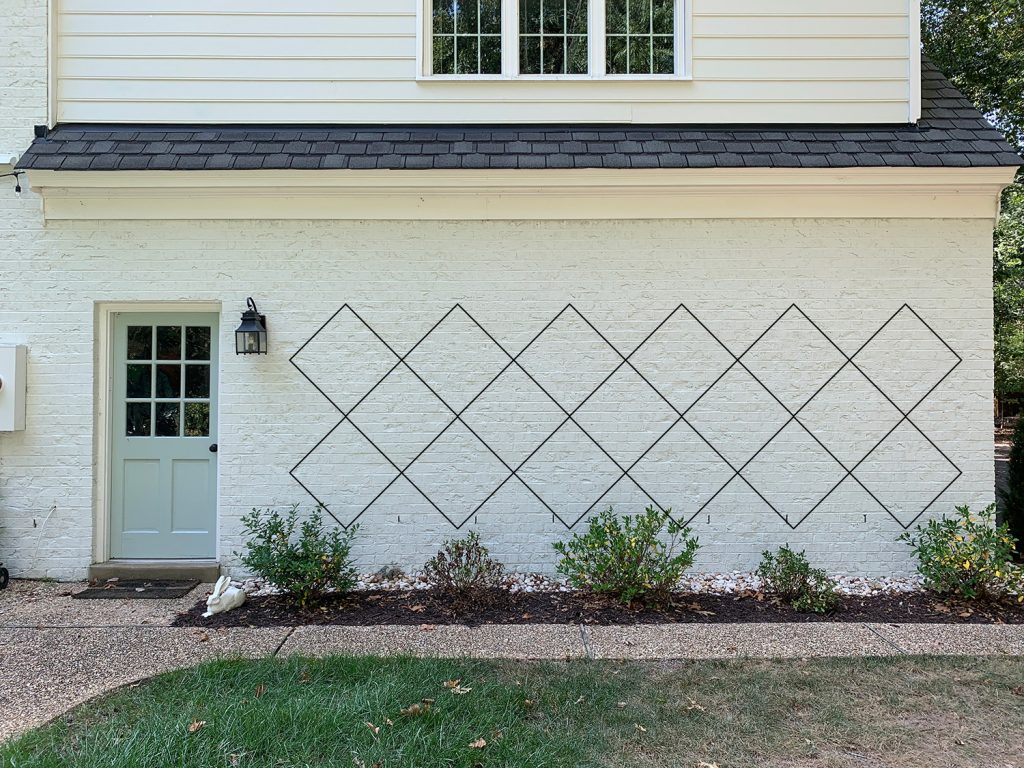
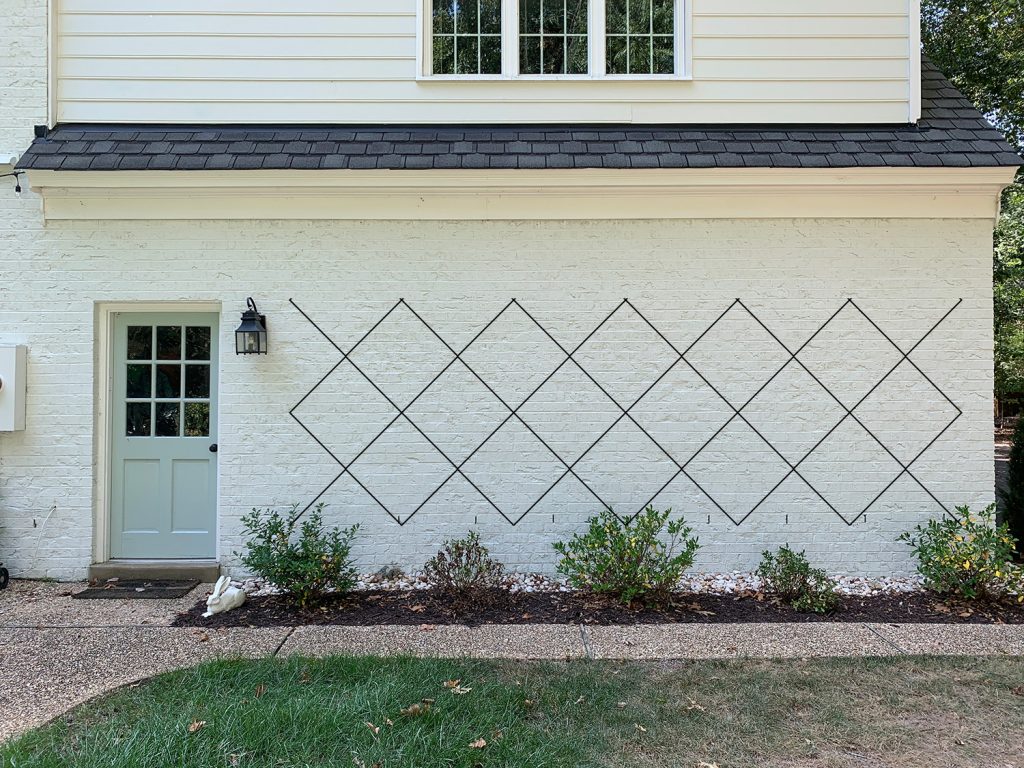
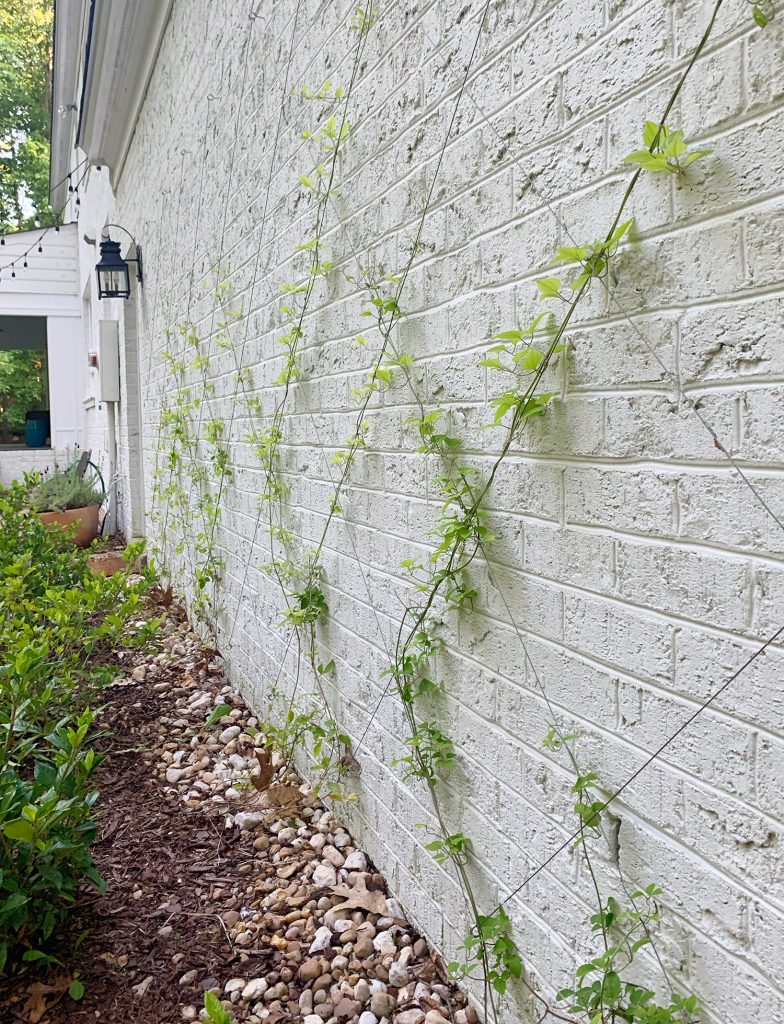
Here’s another more updated shot from a wider point of view for your viewing pleasure:
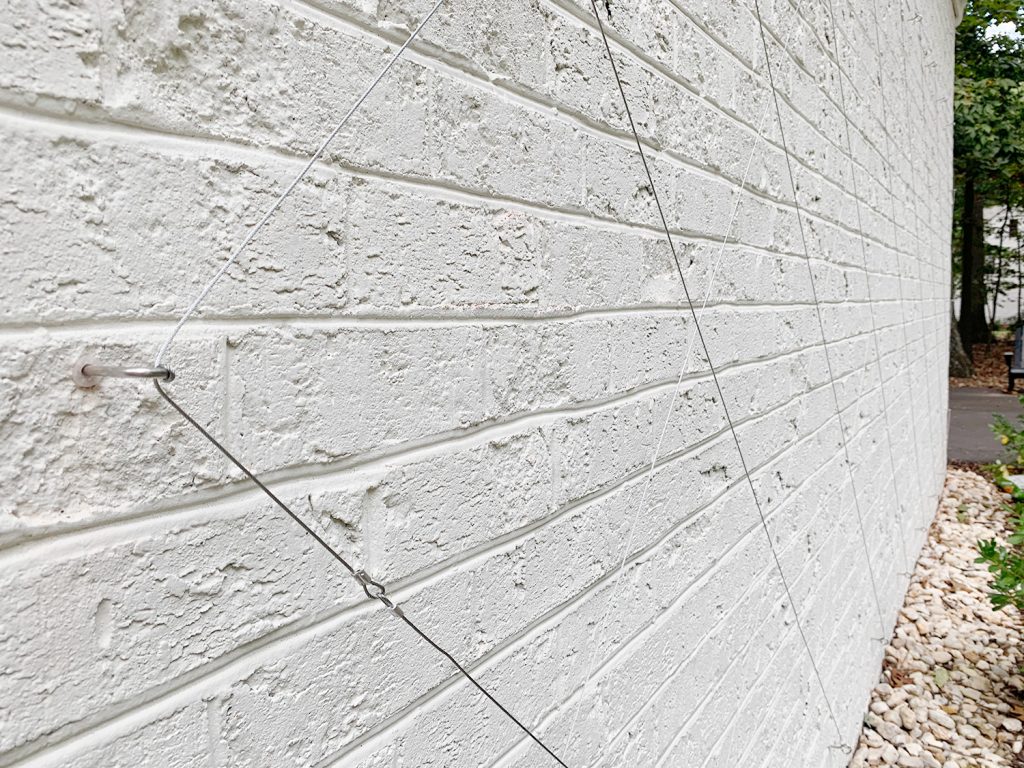
And here it is from the side so you can really see the diamond-shaped wire trellis that we created:
They sell some kits for installing them (like this one and this one) but we decided to buy the pieces ourselves a la cart (that was dumb, just buy the $13 kit – or two if you need more wire). You’ll also need a few basic tools (we added asterisks next to the ones that are required for brick in case you have the same setup that we do).
Materials & Tools
*Reminder: These are for installing a trellis on brick. Other types of siding or fences may require different supplies or tools. For example, a regular drill and drill bits should work just fine.
Step 1: Plan Your Wire Trellis
The first step is deciding what you want your vine trellis to look like. We used Photoshop to help us visualize our options, but pen & paper could also work. This is a vital step to make sure you like placement, size, height, etc. We rendered this design first, but quickly decided the scale felt too large.
We also considered “open” diamonds on the side. It looked too much like an argyle sweater to us, so we decided to try another “closed” diamond pattern.
We finally landed on this design: a smaller version of our first. Thanks to this planning process, we could ensure it was centered on the wall AND lined up with other elements, like the door.
This planning step also helped us calculate how much material we would need, like how many hooks we’d need in the wall. If I were doing this again, I would include a tape measure or yardstick in my original photo to help with the next step.
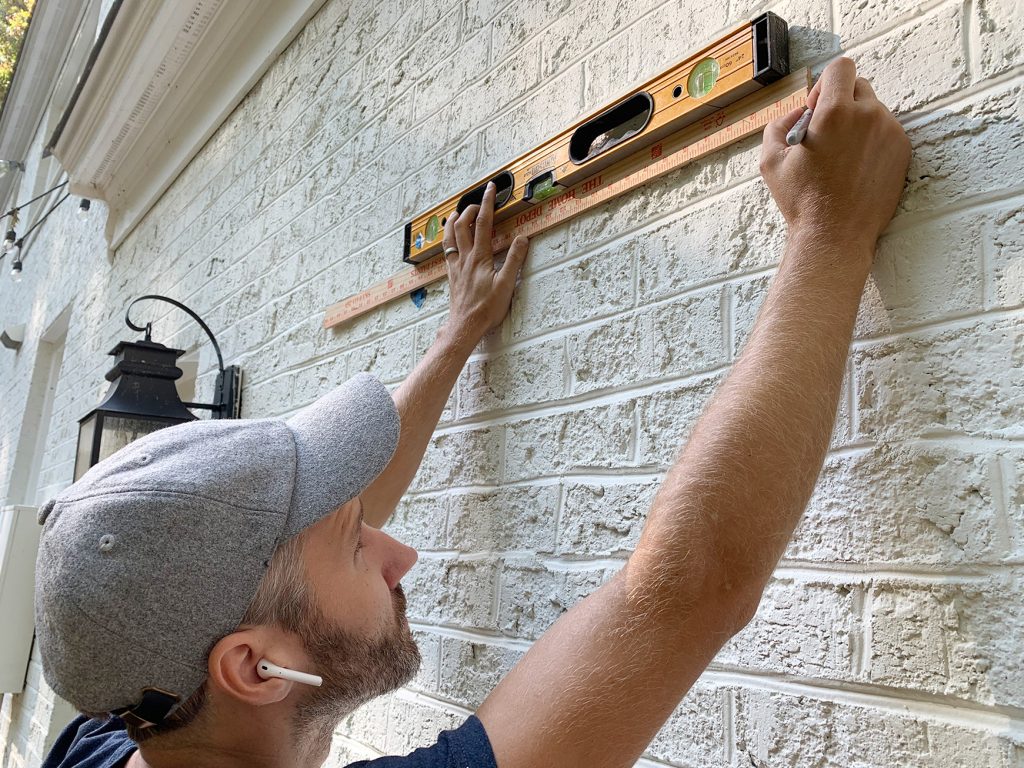
Step 2: Map Out Your Pattern In Real Life
Transferring our digital mockup onto the physical wall was the most brain-intensive portion of this project. It wasn’t hard, it just required lots of concentration. We matched-up some reference points on our photo to figure out where our pattern should start on the wall. And, through some trial & error, we determined the precise spacing of our diamonds: they are 25″ apart.

We used a level and yardstick to carefully mark each of our anchor points with a small piece of painter’s tape & marker dot. We didn’t want to write directly onto the brick until we finalized everything.
Once every anchor point was marked, we DOUBLE- and TRIPLE-CHECKED all of our measurements. It seems tedious, but a pattern like this relies on precise & even spacing so it’s important to be perfect. Even one anchor point out of level or unevenly spaced can ruin the whole design. So don’t rush this step. It’s much easier to move tape than it is to redrill holes.
We also used a long piece of scrap wood to check the vertical level of our points, making sure the top points were perfectly in-lin with the ones belong them.
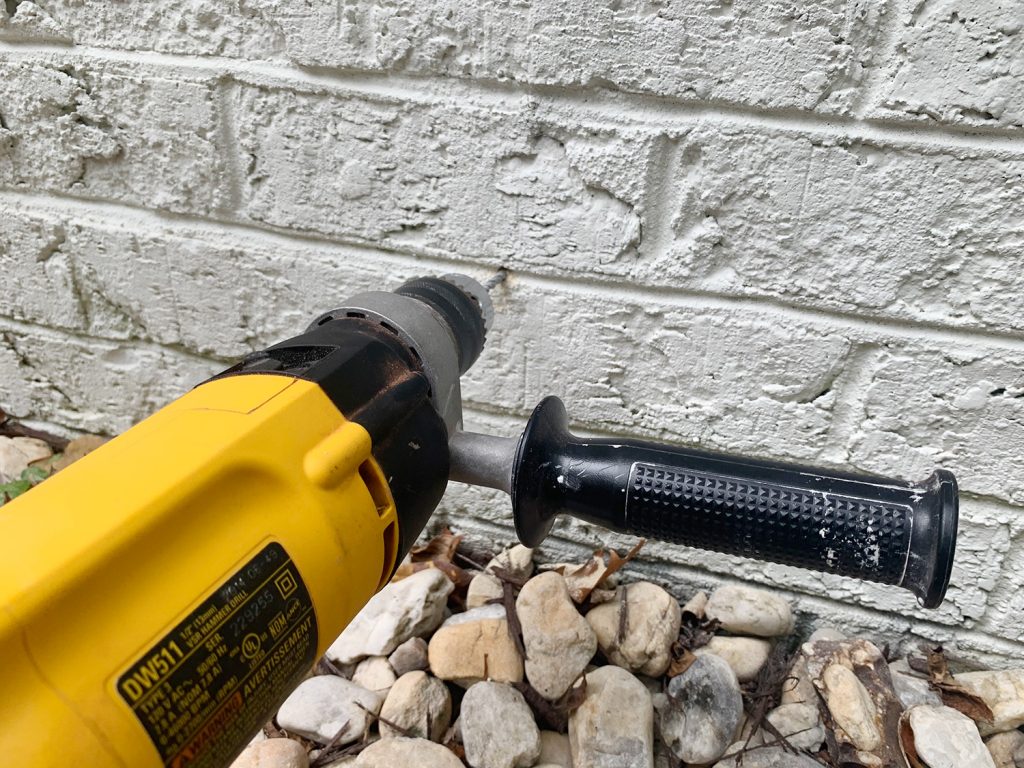
Step 3: Install Your Anchor Points
Once your spots are marked, you can get to drilling. A hammer drill with a small masonry bit is best for this step. First, we made shallow holes through each of our tape marks to make a more permanent mark on the wall before any tape fell or blew off.
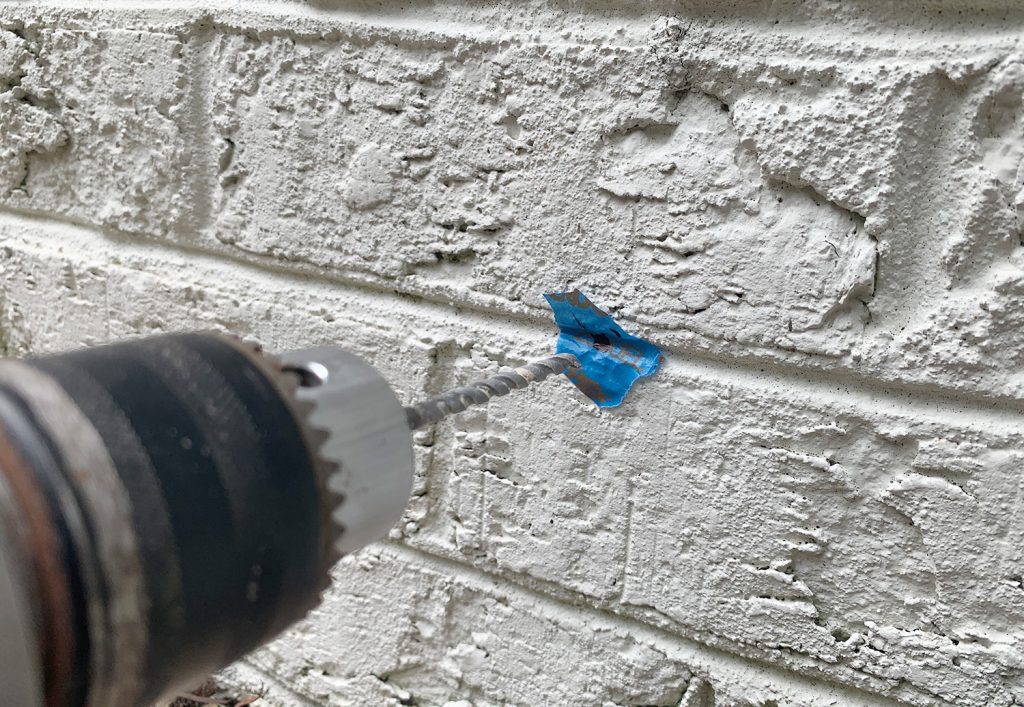
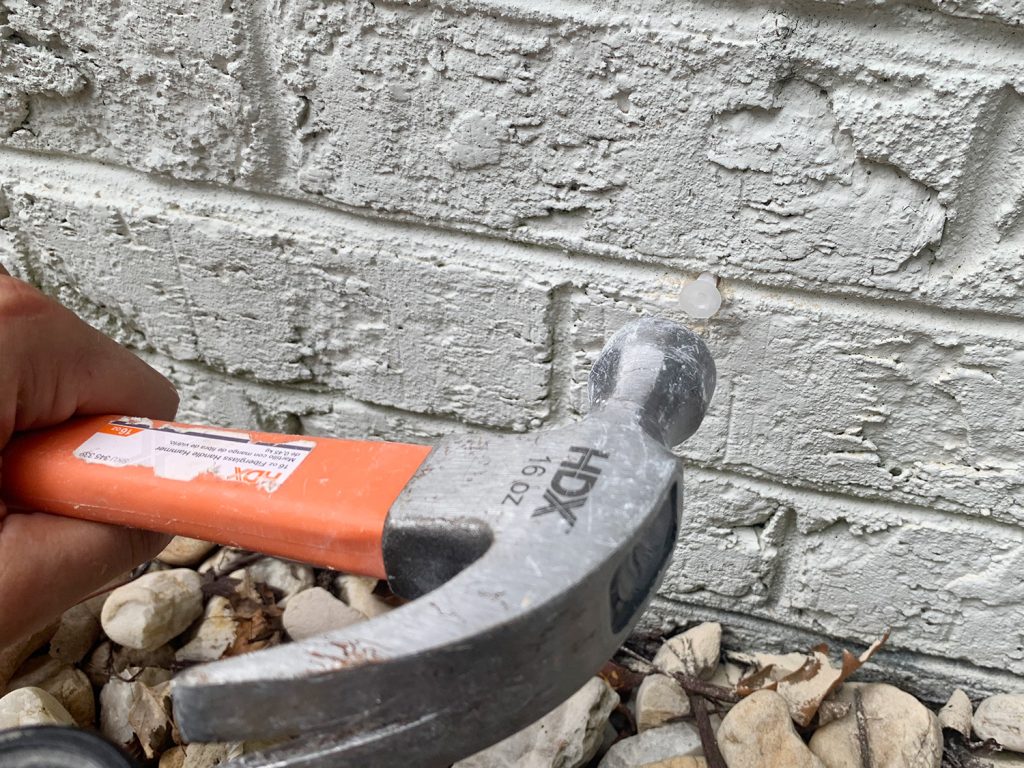
Then we went back around with a bigger bit to drill a larger and deeper hole to slip the anchors into. In addition to the spinning motion of a regular drill, a hammer drill also pulses or “hammers” at the same time. This makes it easier to chip away at masonry materials like brick, concrete, or block.
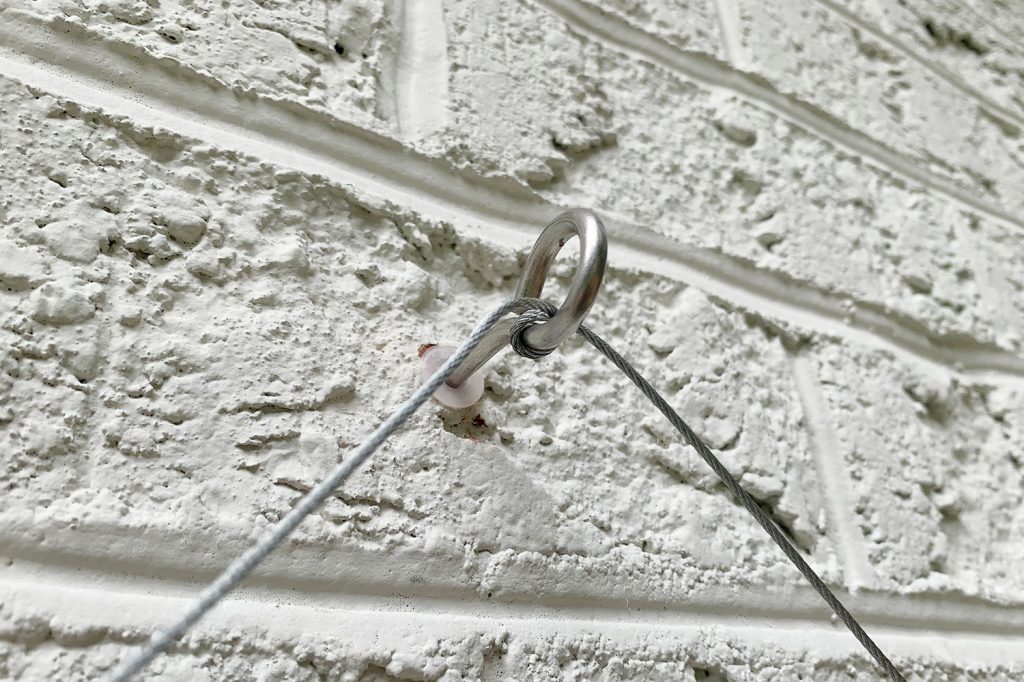
Once all of our holes were made, we lightly hammered a plastic masonry anchor into each hole. Typically I would use something like a Tapcon screw to screw something into brick, but in this case we needed something that would work with the screw eye hook.
Lastly, we went around and screwed in our eye hooks. We wanted eye screws that stuck out from the wall enough but weren’t too enormous. The 3″ eye hooks were a good find because the visually disappear, but are long enough to separate the trellis from the wall. That way our vine has plenty of room to grow and wrap around the wire on both sides.
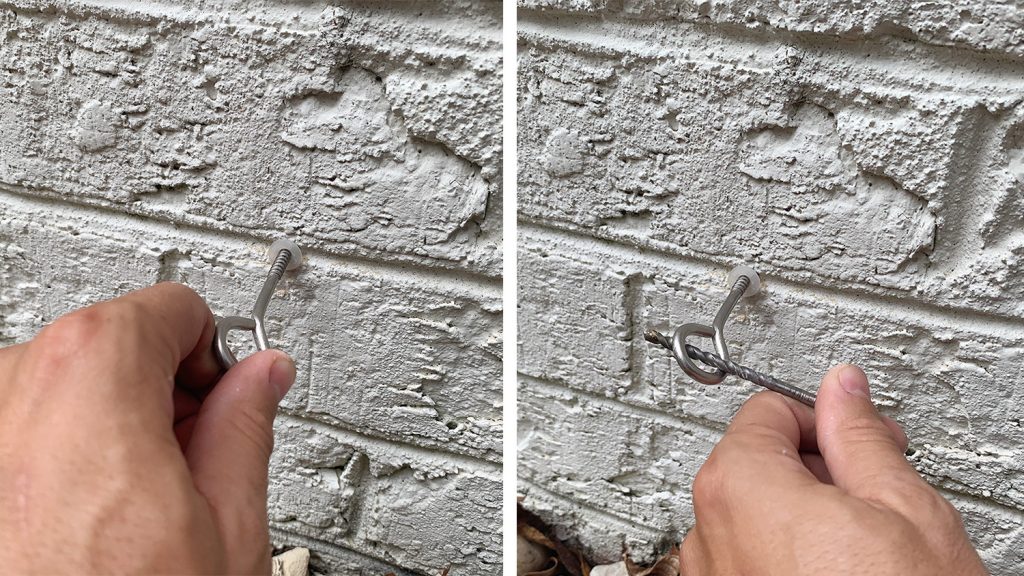
The eye hooks were easy to hand tighten into the anchor at first, but we used a spare drill bit to give us more leverage for the last few spins.
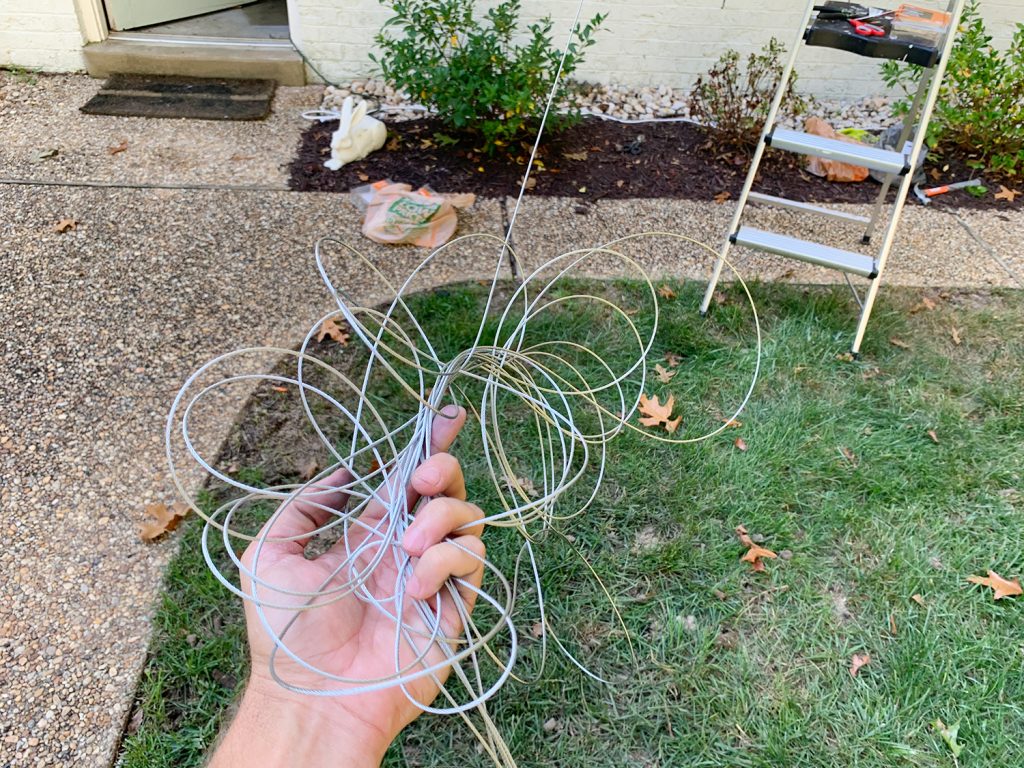
Step 4: Attach Your Wire
We used 1/16th galvanized steel wire rope for the cables of our trellis. We were sure how much we’d need, so bought several 50ft packs so it’d be easier to return any unused material. We ultimately needed 3 packs. I recommend opening and unwinding the wire before you start attaching it since they often come out in a tangled mess.
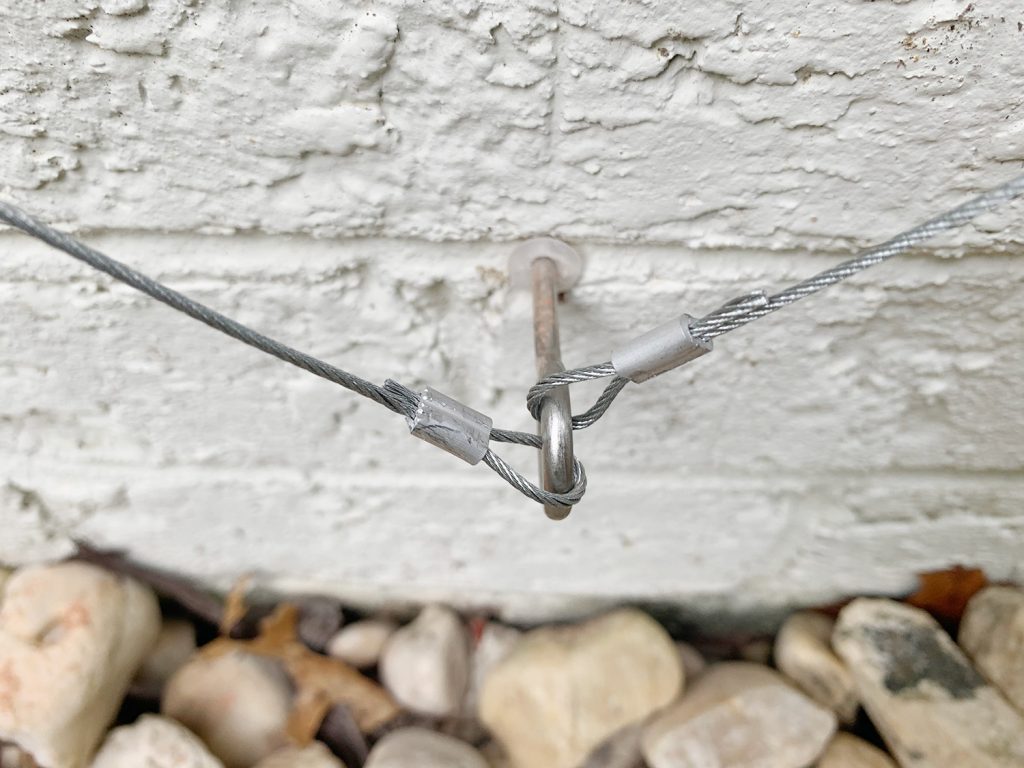
Attaching the wire to your first anchor point is the same technique we’d later us to connect each two strands (seen below). You are using aluminum ferrules to create loops at the end of each section of wire.
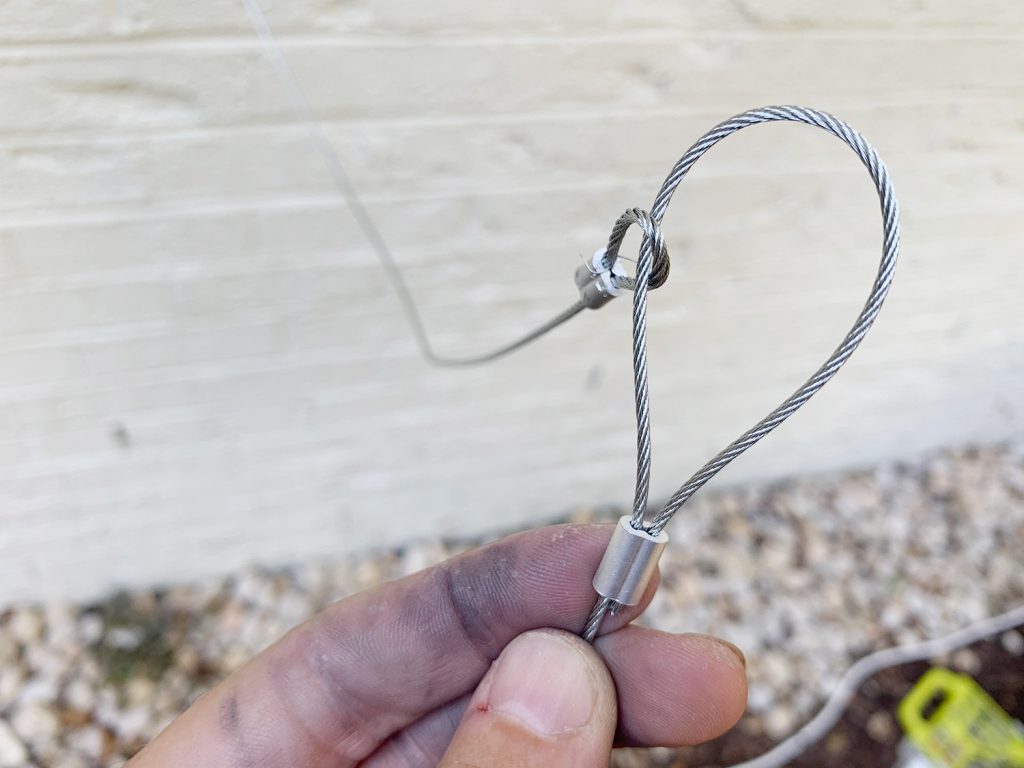
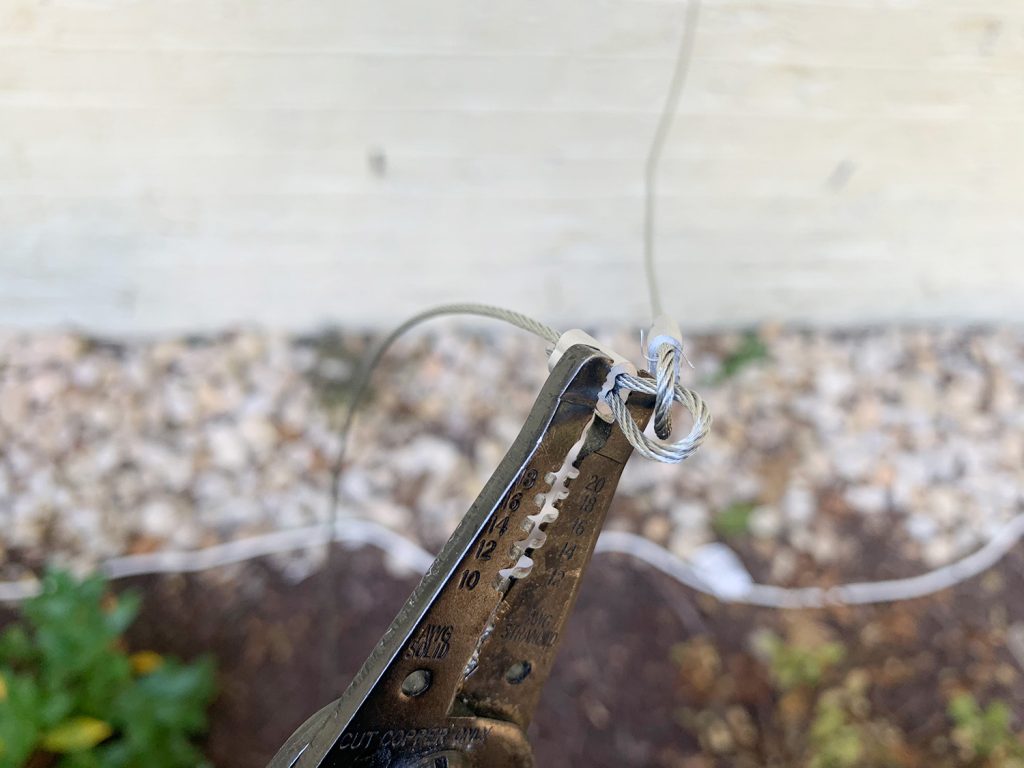
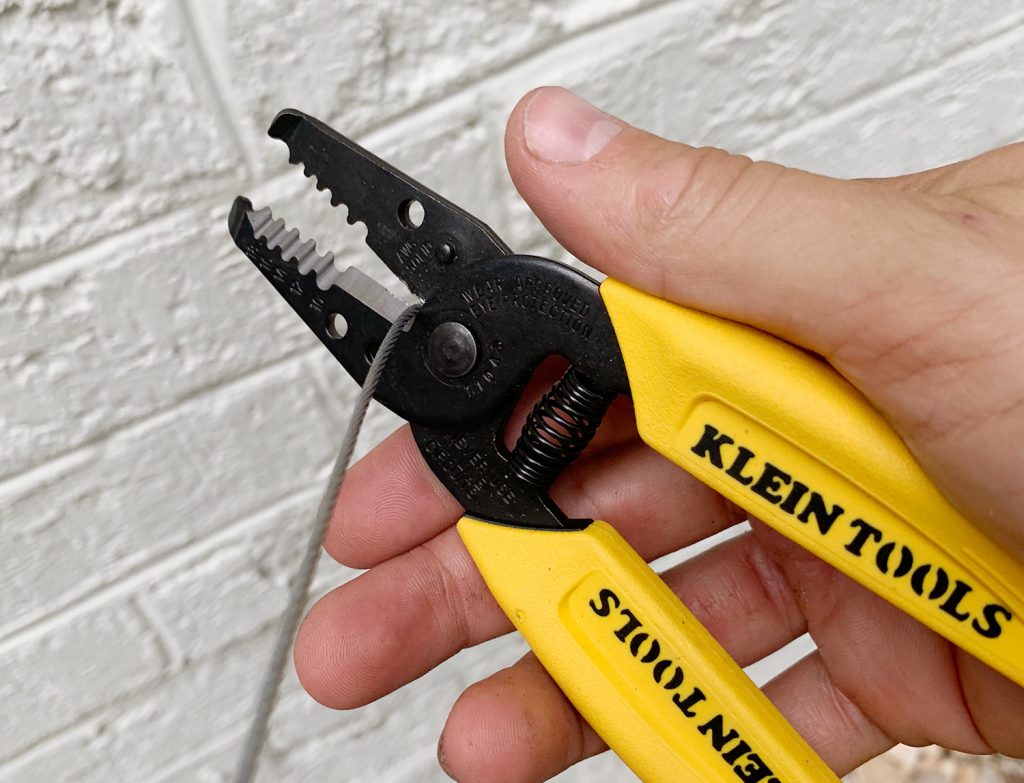
To make the wire loop, thread your wire through each end of the ferrule (it might be a tight squeeze!) and then use wire cutter or pliers to pinch the corners of the ferrule shut. The aluminum is soft enough that you can do this by hand.
Here is what it looked like when we used the ferrule loops to attach the wire to one of the eye hook anchor points.
If you need to cut your wire at any point, you use common wire cutters, however we found the wire dulled our snips over time.
After this project, I learned a more reliable technique. Place your wire on a hard surface, like a stone paver and place a chisel at your cut point. Hit the chisel sharply with a hammer, and it will cut the wire. Just be sure to use a hard surface you can damage, since the chisel may leave marks.
Step 5: String The Wire
Once you’ve attached your wire, your next step is to string it through your anchor points to create your diamond pattern. This step is very straightforward – almost like putting shoelaces into a shoe. Just making sure you’re going to the correct next eye hook. We messed this up once and started to create a wonky diamond, but it was easy enough to fix as soon as we noticed our mistake.
We looped the wire through each eye hook twice as we went, because it helped keep the wire taut as we went. It’s not tied in a knot, but the wire is stiff enough to hold fairly well with a tight loop like this.
Some of the kits come with a turnbuckle that you can use to tighten your wire for maximum sustained tension. We opted not to do one for now just for simplicity’s sake, but if we find ours becoming loose over time we could always add one OR just try twisting some of the eye hooks in the brick a bit tighter to taut things up.
We also found it was helpful to have two people on hand so that one person could pull the wire tight while the other crimped the ferrule closed in the right spot.
Step 6: Add Your Vining Plant
There are lots of good options for vining plants for wire trellises like this. We spoke to two experts at our local nursery and they recommended clematis because:
- It’s a fast grower,
- It produces nice flowers,
- Deer don’t tend to eat it in our area,
- And it isn’t dangerous to put near our brick (Ivies on brick can be problematic over time).
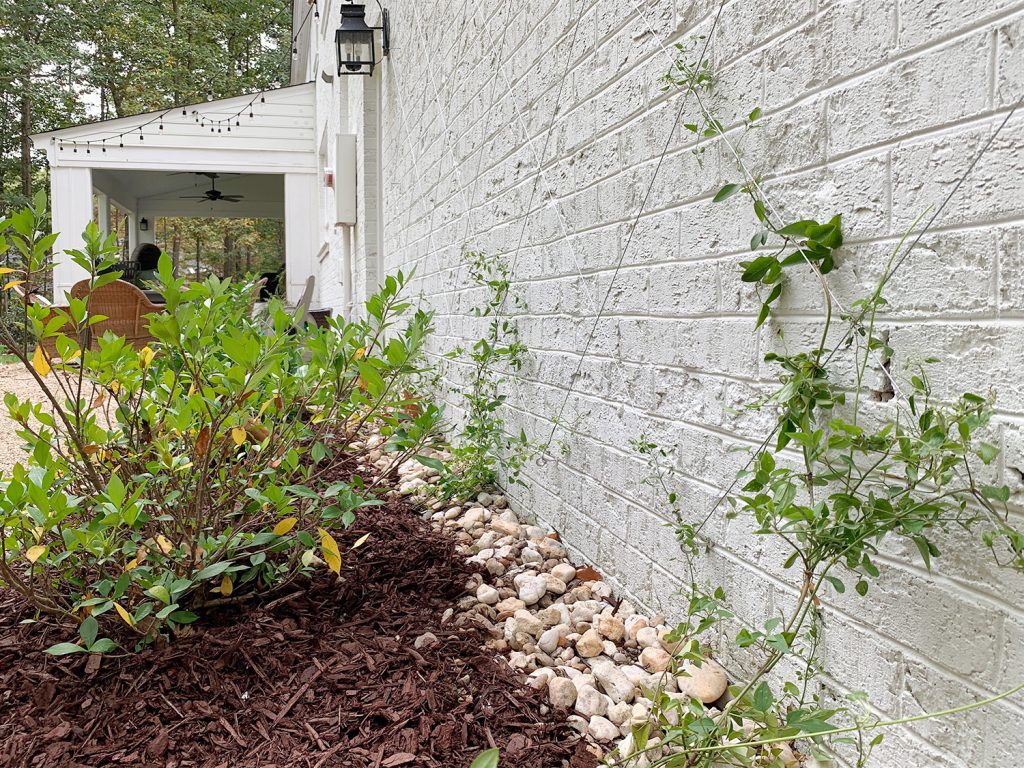
Our local nursery was low on clematis inventory so we grabbed what we could. We planted four vines at strategic intervals along the bottom edge of our wire trellis. After delicately unwinding them from the trellis they came with (each plant had a little metal trellis in the pot), we carefully wrap them up and around the wire in all directions. You can use plant tape if you need help holding them in place.
Next, just be sure to water your plant frequently as it establishes. We also suggest mulching around your new plantings to help them hold onto moisture between waterings.
Step 8: Watch Your Vine Trellis Grow
This last step is the hardest because it requires patience. But after just a few weeks, our clematis was already making its way up our wire trellis like a champ!
It was so satisfying to watch, especially as Spring rolled around and it really started to take off. I mean just look how impressed our chihuahua was. Burger sure did love botany.

I feel like this photo accurately captures my enthusiasm for this project. If only the vines grew at the same speed in which we consumed this cake.

And if only we had lived at this house longer to watch the full potential of this project. The good news is that we’ve done plenty of fun planting here in Florida too! Including a similar wire trellis on our pool fence covered in star jasmine!
More Trellis & Plant Projects
P.S. Want to see more outdoor projects we’ve tackled over the years? Here’s an entire archive full of them (from pea gravel patios & string lights & shed organization to decorative oars – ha! – it covers a lot of ground).
*This post contains affiliate links*


